One of the best emulators to date Android MEmu has gained immense popularity due to the ability to use a Russified interface. Installation and use are straightforward if you know how to change the language in MEmu. The shell was created by the Chinese with the expectation of surpassing the competition and stands out among the analogs with speed, functionality and support for powerful games on relatively weak computers.

MEmu advantages
This is a free application. Besides a choice of 16 languages, including Russian, MEmu allows the user to emulate the Android versions of Jelly Bean, Kitkat and Lollipop.
The program supports almost all devices with OS Windows, including the tenth version.
It doesn't matter if the PC has a Intel or AMD based processor, NVIDIA graphics card or Intel HD Graphics, full compatibility is guaranteed.
Other indisputable advantages include flexible configuration, keyboard / joystick key mapping (mapping), GPS position simulation, the ability to simultaneously run multiple images Android and save multiple key binding profiles. Suffice it to say that the emulator differs for the better from the popular BlueStacks by the ability to use a PC webcam.
to the content
Changing the language in the emulator
The ability to change the language in MEmu is considered almost the main advantage of the application. In any case, for most users this is probably the fundamental choice factor. And it's quite easy to enable Russian input. For this you need:
- After installing the emulator on your PC, open the settings.
- Go to the 'Language & input' section and select 'Keyboard & input methods'.
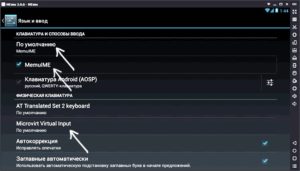
- The MEmuIME keyboard must be enabled by default. If not, check the box next to the corresponding item.
- Open the 'Physical Keyboard' section and then the 'Microvirt Virtual Input' tab.
- It is necessary to install two keyboard layouts – Russian and English, but immediately enable Russian (Russian).

Now you can write in Russian in MEmu. You can switch between layouts right in the emulator using the Ctrl + Space shortcut. Here you can configure the layout parameters. For convenience, it is better to use the External Keyboard Helper application, which will allow you to restore the language change with the Shift + Alt combination, which is familiar to many, or some other.
to the content
Other emulator settings
To set up MEmu on a PC, you need to enter the emulator settings. To do this, you need to do the same as on the regular one Android – click on the gear in the panel located on the right side of the desktop. There are several tabs in the settings:
- 'Basic'.
- 'Advanced'.
- 'Shared folders'.
- 'GPS'.
- 'Hotkeys'.
Here you can configure almost everything that the user needs. In the 'Advanced' tab, you can enable root and connect a virtual keyboard.
to the content
basic settings
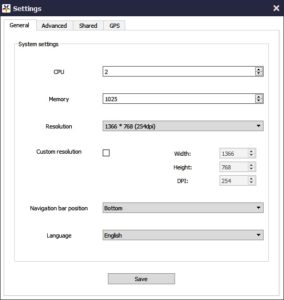
In the 'General' tab, you can determine how many processor cores (CPU) of the computer and how much memory (RAM) will be used, screen resolution, location of the window and navigation bar of the emulator, as well as change the language.
to the content
Keyboard control
In the 'Hotkeys' tab, you can configure keyboard shortcuts for controlling screen modes, enabling the function of taking screenshots and connecting the Boss key, which will hide the emulator window.
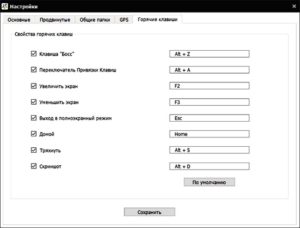
You will need to enable keybinding to screen regions for games. By checking the box next to the corresponding item, the user will be able to move the controls to the desired areas of the screen and assign any keyboard shortcuts to them.
to the content
Organizing folders
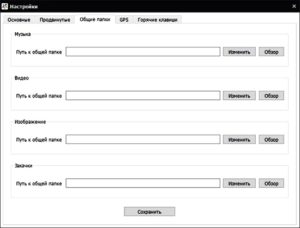
The 'Shared folders' tab allows you to define the path to folders that will be shared between the computer and the image Android (for browsing in the emulator, it is recommended to use ES Explorer).
to the content
GPS emulation
The 'GPS' tab is for determining the location of the virtual machine. At the same time, the card works quickly.

to the content
MEmu update methods
There are two ways to update MEmu:
- Manual (you can offline) – by completely removing the old one and then installing a new application.
- Automatic (online only) – using a built-in function.
to the content
Removing the old version and installing the new version
Upgrade, or rollback, of the emulator in this way is provided by the developer himself. On the official website, in the user group, you can always find the current version. You just need to download and install. Before that, you need to completely remove the old emulator. This is done in the usual way – through the 'Remove Programs' section in the PC control panel.
At the moment, the developer does not provide backup copies, but promises to enable such a function in the near future. In the meantime, users have to save the original data on their own using the function of exporting and importing images into the ova. This is done like this:
- In the menu we find a list of all images Android.
- Opposite the saved one, select the arrow icon.
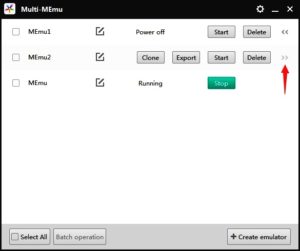
If you need to save some data, you must do this before uninstalling.
Installation does not raise questions even for 'dummies'. Just a couple of clicks – and the program on your computer:
- You can install it by downloading the ARC file from the developer's official website.

- After launching the application, a familiar picture for users Android will appear on the computer screen.
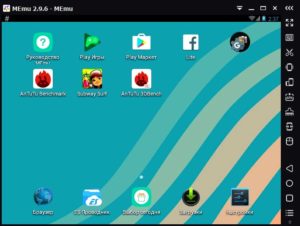
Now you can import your saved images.
to the content
Internet update
The emulator has an auto-update function. The program informs about the release of the most stable version for the user's PC (not necessarily the newest) with a special message. Before the release, the new version is available for testing for two days in groups on the site. That is, the users themselves determine the advisability of releasing a new version. You can check manually for updates. For this you need:
- In the top tray, select the icon with information about the emulator.
- Click on the 'Check Update' icon.

- If an update is available, the emulator will offer to execute or refuse.
If the user refuses, the auto-update feature will reconnect, and the original emulator data will remain intact.
to the content
