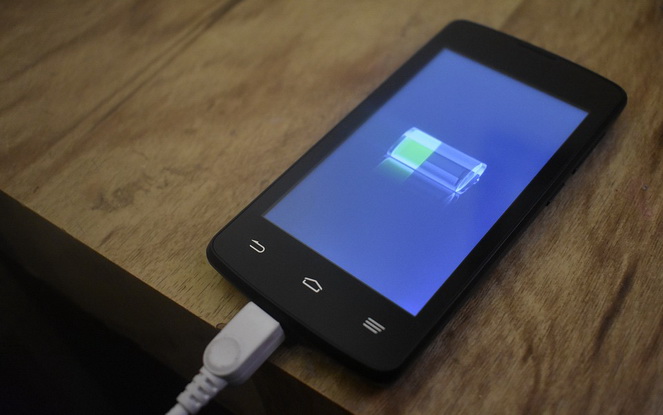
Thanks to powerful processors, modern mobile devices are able to handle large amounts of information, but they require increased power consumption. As a result, the small size of the cases does not allow for the placement of batteries that provide long-term active use. The issue of the longevity of batteries, which have to be replaced every three to four years, is also acute. And there are only two solutions: replacing or calibrating the battery with / without root rights to Android.

- Battery Calibration
- Root rights to Android
- Check for root on Android
- Calibration methods and their advantages
- Manually
- Using programs
- Battery Calibration Android without root
- The first way
- How to find out the battery capacity
- Install CurrentWidget: Battery Monitor
- Calibration process
- Second way
- Third way
- BATTERY CALIBRATION.CALIBRATION OF ACCUMULATOR: Video
Battery Calibration
Calibration is the readjustment of the parameters of the built-in BSM controller, which controls the charging and charge distribution process. The microcircuit operates on the basis of preset parameters, and during operation it 'remembers' the battery capacity.
If these settings are lost, the controller incorrectly detects the capacity limits, and this phenomenon is called a memory effect. Incorrect operation of the controller is expressed in the frequent shutdown of the device with an actually normal remaining charge, and the battery receives an incomplete charge.
to the content
Root rights to Android
By purchasing a gadget, the user gets a lot of advantages of the most popular operating system in the world, but not the opportunity to become its Administrator. He does not have access to the root folders of the OS and cannot modify / delete files without some intervention in the system, which is called root-rights (root – in English 'root'), or superuser rights.
Such privileges open up tremendous opportunities, including uninstalling developer-installed programs and configuring the system for their own needs. And this is used by advanced and not so users who have little out of the box in a device: processor performance, speaker volume or camera settings. The operation does not always end in complete success, and the consequences sometimes even require expensive repairs.
to the content
Check for root on Android
You can verify if you have been rooted by looking at the files and folders on your device. The fact is that root today is acquired more often by software means, and any application will leave signs of its presence in the file registry. If there are icons or SuperSU or Busybox Installer folders on the device, most likely there is root or at least it was.
But this option is not fast. Special programs allow you to quickly check the gadget for rights: CPU-Z and their analogs, which are very much freely available.
to the content
Calibration methods and their advantages
Battery calibration is possible Android without root and with superuser privileges. It can be carried out on a completely new or on a well-worn battery, but it is definitely required if the gadget is discharged too quickly or turns off for no reason at all with a high percentage of charge.
If there is a suspicion that the device is not fully charging, calibration can correct the situation.
There are two methods:
- Manual.
- Program.
It is quite rightly believed that it is with root rights that the guarantee of using the software method is higher.
to the content
Manually
This does not require any programs, you only need a charger and a certain amount of time. The method consists in sequentially carried out several cycles of charge / discharge. Below we will take a closer look at how this is done.
to the content
Using programs
The programmatic method does not take much time. In addition, it is believed that special applications will help the device optimize faster and better. Only for this procedure, it is required to obtain data about the device's battery: capacity, current value, and so on. After entering them into the program, it will more accurately adjust the battery operation, which, in theory, should facilitate the user's task.
The procedure is started with one click of the corresponding button. The utility initiates the exact level of charge, and the readings may differ from the system ones, which are displayed on the device. By continuing to charge as indicated in the program, you can achieve a truly full charge. After 100% charging, a device reboot is required, the battery of which will be correctly calibrated from now on. Probably the most efficient way is to calibrate using the Recovery Mode and Battery Calibration.
to the content
Battery Calibration Android without root
Now how to calibrate the battery on Android without root rights. Without access to system capabilities, the solution must be more complex. In fact, the methods proposed by specialists do not look like that.
to the content
The first way
As we have already found out, the best way to calibrate is software. There is no shortage of free applications on Google Play, they generally do a good job with their tasks, so they are very popular with users.
to the content
How to find out the battery capacity
The above programs need information about the subject of optimization – the battery itself. And first of all, we need data on capacity. Information can be easily found on the battery itself or in the instructions supplied with the device. If the gadget is not collapsible, you can use the Internet. The manufacturer's website should contain all the information. You can find it on the forums or in the review.
Finally, use the so-called digital query:
- Dial##4636##(this one is for Samsung, for other devices the number can be found on the forums) and press the call button.
- In the menu that appears, click on 'Battery Information'.
For reference: capacity is measured in mAh. When the data is at hand, you can select the appropriate application that can indicate the charge in milliamperes. User reviews show that CurrentWidget: Battery Monitor does a good job with the task, although there are others, no worse.
to the content
Install CurrentWidget: Battery Monitor
This utility is available for free on Google Play, but, unfortunately, it does not work on all devices. To check if yours is suitable, you just need to find it in the store and click on the 'Install' icon.

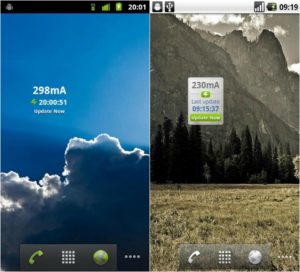
The application widget monitors and shows the current battery charge in milliamperes (mA), it remains only to charge the device to the capacity provided by the manufacturer.

to the content
Calibration process
The procedure is performed in the following order:
- The gadget is connected to the charger.
- During the charging process, you can observe how the current increases. When the growth stops, you need to remove the device from the charge and restart.
Ideally, the parameter should approach the value declared by the manufacturer, and a reset will help the controller remember it. For greater assurance, it is recommended to do 5 full discharge / charge cycles.
to the content
Second way
The manual calibration method is simple and accessible without any utilities. Need to:
- Fully charge the device.
- Disconnect the charger and turn off the gadget. If possible, remove the battery from the case for a few minutes.
- Reconnect the charging cord and, without turning on the device, charge it.
- After recharging, turn on the gadget and turn off 'Sleep Mode' so that the display does not go out. This will drain the battery faster.
- When the charge level drops to spontaneous shutdown of the device, reconnect to the charger and wait until it recovers to 100%.
After that Android should receive and consume the charge correctly.
to the content
Third way
Basically, this is a variation of manual calibration, only the device is charged when it is off. This requires:
- Turn off the gadget.
- Put on charge.
- After eight hours, turn off the charger, turn it on and off for a couple of minutes Android.
- Charge the switched off device for at least an hour.
This battery calibration Android of a smartphone without rooting is recommended by Google. The procedure seems strange, but it really works.
to the content
