Smartphones and tablets of the Korean company Samsung are considered one of the best and perhaps the most popular devices with OS Android. The functionality of any Samsung is always at its best, but sometimes users need to have advanced capabilities, for which they need to get root-rights to Android on Samsung. The advantage of gadgets of this brand is good protection, which becomes a problem when getting root.

- Root rights to Samsung
- What you need to root Samsung
- Route via Recovery and SuperSU
- Preparatory stage
- Enable USB Debugging
- Disable remote control
- Installation instructions for root-rights
- Check for root
- If there are problems
- Removing Knox in Root Browser
- Removing Knox manually
- Waiver of Superuser Rights on Samsung Galaxy
- How to Root Samsung Galaxy S3: Video
Root rights to Samsung
Root is user rights comparable to administrator rights on computers running Windows. On Android, the ability to manage the contents of the root section (root – 'root' in translation from English) is not initially provided. To use hidden functions, you need to perform rooting, that is, manipulations in order to gain access to system folders.
The superuser can do almost anything with Android, up to modifying the operating system itself.
What is the difficulty? It would seem that the OS Android is the same everywhere, but Samsung implements Knox protection systems in its firmware, which can be difficult to bypass.
to the content
What you need to root Samsung
According to the developers, root is not provided for device security purposes. There is always a risk of ruining a gadget if the user has no special knowledge.
After unsuccessful rutting, the device will not even be taken for repair.
So the first and main condition for such an operation is complete confidence in its necessity and success.
In addition, the list of required tools depends on the chosen method of obtaining root rights. In the general case, one is available – software, but there are two options:
- Using a computer. You will need a computer with OS Windows, a USB cable, Odin program, custom Recovery, drivers for a specific model and a well-charged device with SuperSU installed. In this way, for example, you can easily get root-rights to Android 4.3 Samsung Galaxy S3.
- Without PC assistance. You will need a suitable application to install on the gadget (for example, Framaroot).
to the content
Route via Recovery and SuperSU
For Samsung models of the latest versions, it is the custom (CWM) or extended (TWRP) Recovery option using the Odin program that shows very high efficiency. Moreover, for the gadgets of this manufacturer, this is practically no alternative. It has been used for a long time and very successfully, but it is not the only one for all models Android.
to the content
Preparatory stage
So, decided to root Samsung. Before the operation, you will have to prepare the gadget itself and the computer with which it will be stitched. The device needs to be charged, preferably fully – the process will consume a lot of energy, and the possibility of recharging will not be presented, since the connector will be busy. The USB cable must be checked.
On a computer that must also be connected to a power source, you need to install the Odin application, download, unpack the firmware and install the driver for Samsung. You need to install or update the existing SuperSU program on the gadget. The latter is not difficult, since this free application is available on Google Play. It is better to download the update archive UPDATE-SuperSU.zip and place it in the memory root.
As for the Odin needed to root Android on a Samsung Galaxy, things are a little more complicated. The program is freely available on the Internet, but it is not recommended to use the russified versions. The most stable versions are 1.85 (for models up to 2011), 3.07 (from 2011 to 2014) and 3.10.6. (for newest models).
The best way to download custom firmware is from samsung-updates.com. If you don't want to download via file sharing, you can use the Samfirm program. TWRP firmware is available on the website.
to the content
Enable USB Debugging
First of all, you need to enable USB debugging mode on Android. This feature is available on Samsung and is used for testing applications by developers. It is disabled by default. To activate the connection of the device to the PC, the option must be enabled manually. This is usually done in the Developer Options under the Settings menu.
Devices with Android 6.0 do not have this section. To enable the function, you should:
- Enter settings.
- Select the section 'About phone'.
- In the list that opens, click on the 'Build number' seven times.
- Enable USB Debugging.
Here you immediately need to enable 'OEM Unlock'. 
to the content
Disable remote control
The remote control feature will prevent you from getting a root, so you need to disable it too. For this you need:
- Enter the 'Security' section.
- Open the 'Find My Phone' tab and move the 'Remote Control' lever to the 'Off' position.

to the content
Installation instructions for root-rights
Now how to set root rights on Android 6.0.1 Samsung. The procedure should be as follows:
- The gadget is put into download mode. First it turns off, then the volume down, center and power buttons are clamped. When the menu opens, the volume up button is pressed.

- Android connects to PC.
- Odin runs on the computer.
- The Re-Partition checkbox is unchecked in the program window.

- In the AP field, select the path to the file with the .tar or tar.md5 extension (depending on how many files are in the firmware) and press the 'Start' button. If the firmware includes many files, then the paths to them must be indicated as in the presented photo (in different fields).

- After the message about successful completion of the operation (PASS) appears, the gadget is disconnected from the PC.
")
After the reboot, Samsung will be rooted.
to the content
Check for root
The most convenient tool for verifying that you have received root rights is the SuperSU application. If you update the application right after rooting, it will instantly become clear whether your Samsungroot has. Root Checker also works well. There are also options for manual verification.
to the content
If there are problems
If you successfully got root rights to Android 6.0.1 on the Samsung Galaxy S5, but it turns out that they are incomplete, you need to deal with the protection. You will have to remove it. The superuser has two options for uninstalling Knox:
- Manually using a file manager such as Root Explorer or Root Browser.
- Using the software delete function.
to the content
Removing Knox in Root Browser
The manual method allows you to thoroughly clean the registry from folders and files that cause problems with root. The file manager will help you solve problems with Samsung proprietary protection. After receiving root rights, for this you need to do the following:
- Install the Root Browser app.
- Open the / system / app section and delete all ARK files starting with KLMS and KNOX.

This helps to completely get rid of protection and get full root rights to Android 6.0.1 on Samsung Galaxy S6.
to the content
Removing Knox manually
A simpler, but less detailed version is now available in software functions. If you are root, you can uninstall any application or feature, including Knox. To do this, you should:
- Call an additional menu from the desktop.
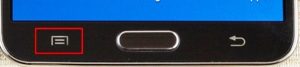
- Select Knox settings.

- Select delete from the menu.
to the content
Waiver of Superuser Rights on Samsung Galaxy
If you suddenly don't need root-rights, the same browser will help you solve the opposite problem. To abandon root, just go to the / system / bin / partition, find and delete the .su file from it. In the / system / app / folder, you must also delete Superuser.apk. After the procedure, a reboot is required. If third-party firmware was not used, you can remove root-rights using the SuperSU application. If used, a flashing is required.
The procedure for giving up superuser rights is no more difficult than obtaining them.
to the content