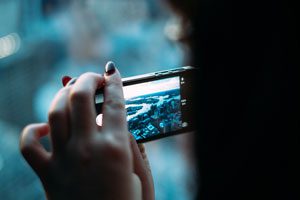
 Over the past few years, the smartphone camera has improved significantly with new sensors, more efficient image processing and sensor size.
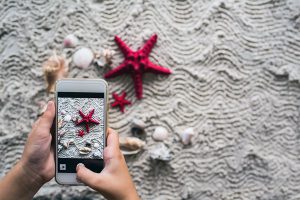
However, having a good camera is only half the road to success. The rest depends on the photographer. Therefore, we have compiled the best tips for you to improve the quality of your pictures.
- Take more pictures
- Use burst shooting or 4K video
- Explore the functionality of your camera
- Install a third party shooting app
- Don't use flash
- Use the Sun correctly
- Turn on the grid and use the rule of thirds
- Experiment with HDR
- Explore Manual Shooting Mode
- Buy a tripod
- Use peak focus
- Clean the lens before shooting
- Use auto-correction in Google photos
- Use a third party photo editor
- Photo can always be cropped
- Add some diagonal lines to the image
Take more pictures
The difference between a regular and a professional photographer most often lies in the number of photos taken. After all, there must be some good pictures among all 300 you have taken, right?
Therefore, the next time you take pictures, if possible, take more pictures. And in order not to clog the internal memory of the phone, use removable microSD memory cards, cloud services (Yandex drive, google drive, cloud mail) or Google Photos backup. By gradually changing your position, focus or shooting angle, you will get many different shots instead of several of the same.
to the content
Use burst shooting or 4K video
Samsung smartphones, group all burst shots into one collection
Burst mode is very handy for taking pictures of children, group shots (there is always someone who will ask you to click again) or moving objects such as pets or a football game. Some smartphones allow you to select your favorite pictures from a series, and the rest will be deleted. It's pretty handy.
I recommend that you try shooting in 4K resolution and select the still frame that you want to save as a photo. After all, 4K screenshots are taken at 8 megapixels. The easiest way is to press the camera shutter button while shooting. Also, several built-in video players (for example, like Samsung's) allow you to capture a frame during clip playback.
What if you don't have this feature on your phone? Then try installing a third party app like AndroVid.
to the content
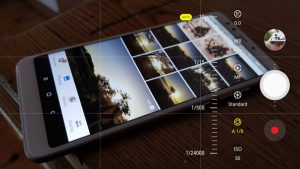
Explore the functionality of your camera
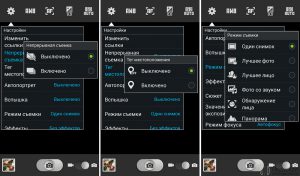
Take the time to learn every feature of your camera app. You will never achieve serious success in photography if you always shoot in automatic mode.
An example is the camera app Huawei where you can tap the screen to focus and then slide your finger out of the focus window to adjust the exposure.
There are other useful features as well, such as the bosie mode on Nokia phones or downloadable camera modes for Samsung (available for download by clicking on the plus sign in the menu). Sometimes it's as easy as activating preset shooting modes, such as freezelight lighting.
to the content
Install a third party shooting app
The preinstalled app doesn't always include everything you need. There are tons of other mobile photography programs on the Play Market.
These apps include everything you need from detailed settings to the most advanced shooting modes. Looking for a manual camera with histogram? Try Footej Camera. Need a selfie app? Then download Candy Camera. Photos will come out better with these applications.
There is also an unofficial Google Camera HDR + app. It's not on the Play Market or iStore, but it's definitely a cool program. Another app is Open Camera.
to the content
Don't use flash
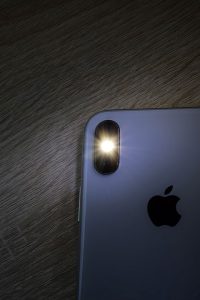
The cameras of modern smartphones (even budget ones) are capable of taking high-quality pictures even in low light, so you may not need a flash. On the contrary, the flash can degrade the quality of the photo.
In fact, many flagships are capable of taking great pictures without using a flash. So next time you shoot at dusk or indoors, try taking a couple of shots without the flash.
Many professional photographers intentionally shoot darker photos because they will then be able to apply shadows in post-processing, but they will not be able to do anything acceptable with the highlights in the image. Dark, cryptic shots can be much more memorable than too bright ones.
to the content
Use the Sun correctly

Try to avoid getting the sun into the frame when shooting. There are, of course, exceptions. For example, if you want to get a silhouette image or just experiment. However, try to keep the sun shining on your subject and not in the frame.
You will probably want to take a couple of pictures at sunset or during sunrise. Take more pictures during this time – you will surely get a great play of light. Everyone knows that the sunset itself looks great in the photo, so you can't go wrong here. You can also try alternating the horizon and sky focusing to get different light variations.
to the content
Turn on the grid and use the rule of thirds

This is one of the basic rules for shooting with a smartphone. The rule of thirds is to divide your camera's viewfinder into 9 parts. This can be achieved by enabling the camera grid on your smartphone, and if the device does not have this option, then you can quite easily split the screen by eye.
Next, following this rule, you should position your subjects ideally on the intersection lines of the grid. This is great advice for photographers (a grid will also help you keep objects vertically correct), but rules are made to be broken, right?
Therefore, it is not always worth following this rule. Yes, it helps a lot, but without it you won't have the trouble of framing and you can take pictures the way you want. Unusual framing can have a huge impact on the final images, so feel free to experiment. As you might have guessed, the rule of thirds does not work with square clipping Instagram.
to the content
Experiment with HDR

Left – no HDR, right – with HDR. Pay attention to the detail of the clouds.
Almost every smartphone today has an HDR mode that combines multiple exposures to produce the best image. By taking this approach, you will get more detailed images of shadows and highlights. Some phones automatically use HDR, but others will need to be turned on in the camera settings.
HDR works best with landscapes and urban backgrounds, where a combination of bright skies and dark shadows can produce unwanted results. Pictures without HDR may have overly bright skies or overly dark objects in shadows.
Google Pixel phones prove that HDR photography (and especially in HDR + mode) can be useful for night shots as well. Thus, this mode is not limited to daytime shooting.
to the content
Explore Manual Shooting Mode
It may be called manual mode or PRO mode. For beginners, this may seem daunting. Do not read long tutorials, but rather practice all the functions of your camera.
Here are some tips for handheld shooting:
- Pressing the camera shutter adjusts how long the camera shutter is open; it is better to hold it longer in the dark, but you have to hold the camera still.
- ISO is a light sensitivity control. ISO should be set slightly lower in the daytime, and higher in the dark. Setting it too high results in noticeable noise or graininess in photographs.
- Adjust the iris – these are the holes in the shutter that let light through the lens onto the sensor.
ISO, exposure, and aperture settings form an “exposure triangle.” Therefore, adjusting one setting can often lead to the need to adjust another. Many smartphones won't let you adjust the aperture. But you need to know about the concept of a triangle if you want the coolest advice on smartphone photography.
Just remember that pressing the shutter button for longer will blur if the phone is not stabilized. Find a low base to stabilize your phone and hold your breath. So there will be almost no blur.
By propping up your phone with something using a timer, you will prevent any camera shake. Or you can try the following tip …
to the content
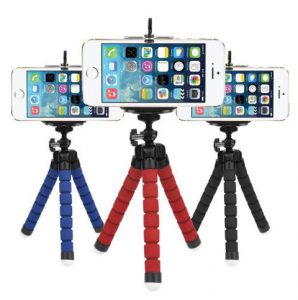
Buy a tripod
Long exposure shots can be really beautiful. They capture light rays and other details in the dark, such as the movement of night clouds. This usually requires the camera shutter to be open for a while, which will inevitably result in blur unless you're 100 percent still. Some phones use Intelligent IS so you can take pictures with shutter speeds of up to 4 seconds.
One of the best decisions is to buy a mobile tripod that allows you to get perfectly stabilized long exposure shots.
Either way, a mobile tripod will still be useful if your phone blurs dark shots a lot. Buy a folding device and you can take it anywhere, even on a trip around the world. Use the timer with it for more scenic group shots. The tripod can also be used for wide-angle selfies.
to the content
Use peak focus
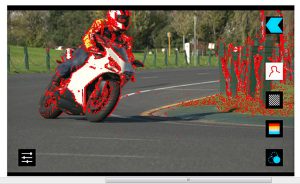
Notice the red outlines around the edges of the petals. This is Peak Focus.
Use the 'Focus' option. This feature highlights the subject of your focus to make it more visible. Basically, it tells you exactly where the camera is focusing – not only on your subject, but other objects in the same area as well. You can use this in conjunction with manual focus in manual or professional shooting modes.
to the content
Clean the lens before shooting
Lenses often play a secondary role in comparison to other camera features such as aperture, sensor size, and second camera. But this is also an important part of good photography, because you won't get a great shot with dirty lenses.
I advise you to always wipe your lenses before shooting. Use microfiber to avoid scratching the sensitive lens. When this becomes a habit, the number of high-quality photos taken with a smartphone camera will increase.
to the content
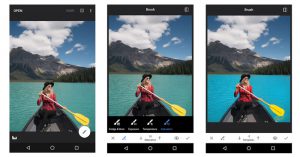
Use auto-correction in Google photos

It's not a big difference here (the auto-corrected photo on the right), but overall it's a useful feature.
Google Photos is more than just a photo backup service as it has a variety of photo editing tools. These tools let you tweak everything from lighting and colors to framing.
However, you can ignore all of these settings and just use the “auto” function (click the edit option, then click “auto”). By doing this, you will immediately get visually better image adjustments.
to the content
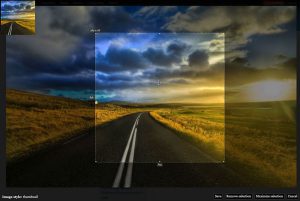
Use a third party photo editor
An interesting application for editing photos right on your phone is Snapseed. The editor has a variety of features ranging from RAW editing to white balance. It has built-in filters, formatting, and automatic editing.
to the content
Photo can always be cropped
Many budding photographers do not use cropping, but in vain. If earlier many smartphone cameras were with rather low resolution and photos after cropping were of poor quality, today 8MP is more than enough for cropping a photo.
So make the photo wider than you intended and then quietly crop for the perfect result. If you haven't used the rule of thirds when shooting, then photos can be easily corrected by cropping.
to the content
Add some diagonal lines to the image

Diagonal lines can draw more attention to the picture
I advise you to always pay attention to the diagonal lines when you are photographing. Watch out for things like roads, drawn lines, and diagonal buildings as you shoot – they add a sense of depth to your photo. By getting the correct shooting position with diagonal lines in mind, you can direct the viewer's eye towards your subject.
Try tilting the camera 45 degrees so that roads, buildings, and other objects are positioned diagonally. Who said that you only need to shoot straight all the time? Why not go crazy and try to shoot reflections in a puddle by turning the resulting image upside down?
I hope these tips will help you think outside the box and take a new approach to smartphone photography!