Today the user has access to a large number of emulators of different operating systems for the OS Windows. Android is no exception. In addition, many players have been created for emulation on the most common platform. Among them, the best are BlueStacks, Nox App Player, Andy. In this article we will try to figure out how to use the Nox App Player.
- Main pros and cons
- Installing Nox App Player on PC
- Launching the player
- Switch language
- Installing and running the game
- We enter Google Play
- Download and install the game
- Additional Nox App Player options for advanced customization
- Shared folders and virtual machine files
- Removing Nox App Player
- Review and installation Android of the Nox APP Player emulator on a PC computer and laptop (2017): Video
Main pros and cons
The first thing that sets Nox App Player apart from similar programs is the ability to connect a gamepad and game controllers. You can customize each button on the keyboard, as they say, for yourself (pressing anywhere on the screen, swipes, tilts, shake, and so on), as well as do it all on a gamepad.
The main drawback, which cannot be ignored, is the OS version the player is built on. Today Android 4.4.2 is far from a novelty, although the developers claim that they used advanced optimization technologies and there should be no problems. There are other nuances that you should know about if you want to use this program.
to the content
Installing Nox App Player on PC
Before you start installing the emulator, you need to check the specifications of your computer. The minimum system requirements are as follows:
- OS Windows XP х32 SP3 and higher;
- processor with support for virtualization;
- video card with support for OpenGL;
- RAM – 512 MB;
- hard disk space – 1 GB.
After making sure of compliance, download the application from here and follow the instructions:
- Double click on the downloaded application and agree to grant administrator rights.
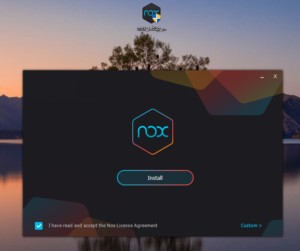
- In the window that opens, select the installation location by clicking on the Custom button.
- We put a tick next to the license agreement and click Install.
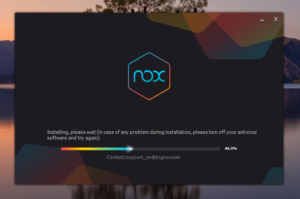
- We are waiting for the download to finish.
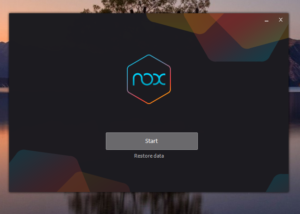
- Click on 'Start' and use it.
to the content
Launching the player
After successful installation of the program, two shortcuts will appear on the desktop. Double click on the one named Nox if you don't have a discrete graphics card. If there is, right-click on the same icon and do it like this:
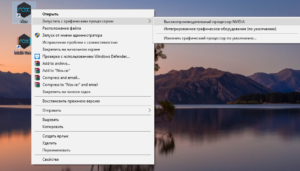
After downloading, the main program window will open.
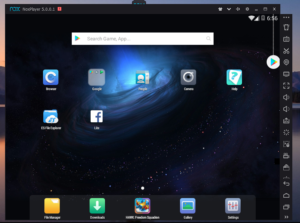
From now on you can use the player. All functions of the emulator are available immediately after installation. You have two file managers at your disposal, browser and downloads, Play Store and several programs from Google. There are also contacts, camera and gallery. In the upper right corner of the player, there is a pop-up icon for advertising recommendations from the developers (not to be confused with Google Play, which is originally located in a folder on the home screen).
The functions of the Nox Player itself (non-emulated system) are displayed on the sides of the emulation window. In the upper part there are buttons for window control and system settings. The following buttons are located on the right:
- 'Shake device' – needed for some games;
- 'Control settings' – allows you to assign buttons responsible for clicks, swipes, control sticks;
- 'Take a screenshot';
- 'Location' – improves the performance of some programs and services;
- “My Computer” – allows you to exchange different types of files between a virtual and a real system;
- 'Full Screen';
- “Volume control”;
- 'APK' – selection and installation of applications from a computer;
- 'Reboot';
- 'Macro recording' – assignment of a specific scenario that the device will play. For example, you can automate resource farming in some games, do routine work in one click, etc.;
- “Screen video recording”;
- 'Multiplayer' – allows you to run multiple virtual devices at the same time. The button will help you find friends in different games (multiacc);
- Screen rotation.
Next, there are three standard buttons in Android – 'Back', 'Home' and 'Browse recent apps'.
For ease of use, you can change the language, set a suitable operation scheme (the number of cores and RAM involved depends on it), resolution, rendering and optimization modes. You can also activate root rights.
to the content
Switch language
Immediately after starting the emulator, users install their native language in the application. You can change the language in Nox App Player by clicking on the 'gear' at the top of the window near the 'Minimize' button. The following window will open:
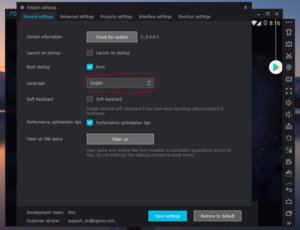
In it you need to click on the inscription English and select the language in the drop-down window. After that, click Save Settings at the bottom of the window and use the selected language version. When you change the language of the player, the changes in the virtual system happen automatically.
to the content
Installing and running the game
You can install the game in Nox from your computer using the 'My Computer' button in the right toolbar. Everything is simple here: find the apk-file and run it. You can use a dedicated setup button from the same menu. The third and easiest way is to drag the installation file from the PC to the virtual machine.
If you do not have the installation file on your computer, download it through your browser or use Google services. But you need an account for this. You can create a new one or enter an existing one.
to the content
We enter Google Play
First, you need to sign in to Google Play. Surely everyone knows what her icon looks like, but just in case, in the screenshot below, we will circle it in red. By the way, applications with promotional offers from developers are crossed out in red. If you don't need ads, just don't open them.
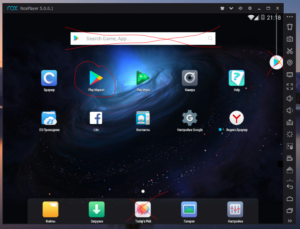
So, going to Google Play, enter your data and click on the next arrow. The account will be verified and, if everything is in order, it will offer you synchronization and a newsletter by mail. But since this is an emulator, it is better to uncheck these items.
to the content
Download and install the game
After entering the application, you can start using it as usual, just like on a smartphone. We enter the desired game into the search, for example, Hay Day, and press 'Enter'.
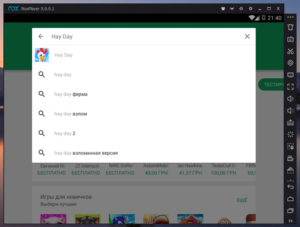
We click on the found game, then – 'Install'.
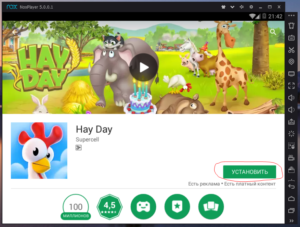
After accepting the license agreement, the download and installation of the game begins. As soon as the installation bar reaches the end, a shortcut will appear on the home screen. From this point on, the game is functional.
to the content
Additional Nox App Player options for advanced customization
Opening the player settings (the 'gear' in the program header) and navigating to the 'Advanced' tab, you will find some interesting options.
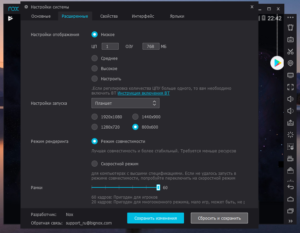
In the first block, you can select the graphics quality. To do this, simply specify one of the three display modes. The number of cores and RAM will be set automatically. You can also check the box next to the 'Customize' item and choose these parameters yourself.
In the next block, we define the display settings (phone / tablet or 'By resolution'). It is better to leave the 'Frames' field as is, and change the rendering mode only if the application has not started.
to the content
Shared folders and virtual machine files
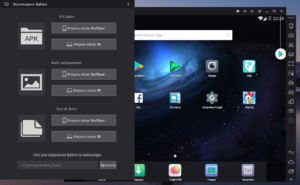
Shared folders are places where you can share files between a physical machine and a virtual machine. You can find such a folder in the Nox App by clicking 'My Computer' on the right toolbar. A window will open, at the bottom of which the path to the shared folder will be indicated, which can be opened using the 'Browse' button.
to the content
Removing Nox App Player
To uninstall the program in older versions Windows:
- Go to your control panel.
- Under Programs and Features, find Uninstall Programs.
- In the list that appears, select the name of the player and click 'Delete'.
If the PC version is Windows 10:
- Right click on the Start menu.
- Select the line 'Apps and features'.
- In the menu that opens, find the name of the player and click 'Delete'.
to the content
