 One of the more interesting changes that Google has made to the platform Chrome OS and Chromebooks in recent years is support for Android – apps. While this system can already run Chrome browser extensions, web apps, and Chrome apps, the advent of millions of programs from Android has greatly increased the platform's value.
Most newer Chromebooks natively have access to the Google Play Store, which allows you to install programs for Android. If your Chromebook model was released in 2017 or later, it definitely knows how to work with Android – applications.
Google has released a long list of Chromebooks that have access to Android – programs. If your device is not on this list, you can still make it work with the programs you want.
If the chromebook already supports Android – apps
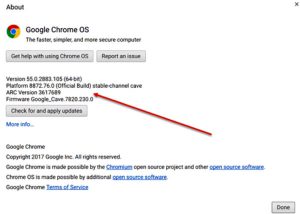
- Step 1. Make sure the latest version of Chrome is installed. This is version 53 or newer.
- Step 2. To check, select the Status section and the settings icon. Click “O Chrome OS” at the top of the screen.

- Step 3. Here select “Check for Updates”. If there is an update, install it. After that click on the “Restart” button.
- Step 4. When your Chromebook is updated, open “Settings” again. Go to Google Play Store and highlight “Enable Google Play Store on Chromebook”. You will need to agree to Google's terms of service to proceed.
The Google Play Store application will open, you will need to accept some additional terms. After that, you need to go to the section “How to download” described below to install applications.
to the content
If the chromebook does not support Android – applications
Switching to developer channel / mode puts the Chromebook at risk of running pre-release software. There may be bugs, something may not work, there may be no support. There is a big catch here: to return to a normal stable channel, you will need to perform a factory reset.
Before doing this, make sure that the required data is copied to a safe place. If you don't want to work with unstable software, it's best not to go to the developer channel.
to the content
Switch to developer mode Chrome OS
If you do decide to take a chance, it's pretty simple to do it.
- Step 1. In the status section in the lower right corner, click on the “Settings” icon.
- Step 2. Go to the “About Chrome OS” section above to check the version number and current channel.

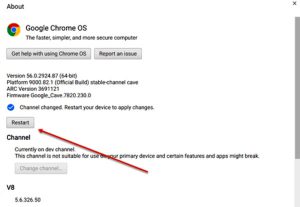
- Step 3. Select the “Additional Information” section to expand the page. Click “Change Channel” and a dialog box will appear where you can select a new channel for your Chromebook.
- Step 4. There are two options here: “Beta” and “For Developers – Unstable”. Select for developers and read the warning carefully. If you are sure, click the Change Channel button.
- Step 5. Chrome OS will update the device and enter developer mode. Wait for the process to complete and click on the “Restart” button.

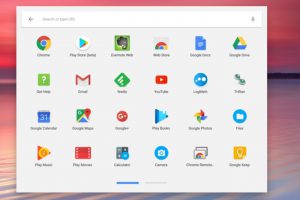
- Step 6. When the chromebook restarts after applying the update, log in to your account as usual. You now have access to the beta version of the Google Play Store app in the app list.

- Step 7. Open the Play Store app and read the terms of use, backup options, and the request to collect anonymous location information.
- Step 8. Click on the “Agree” button. The app store is set up and you are prompted to accept the Google Play Terms of Service. Click “Accept”.
The app will open and you will be able to sign in to your Google account, which is where you sign in to your Chromebook. If you are asked to set up a Play Store account, follow the instructions.
to the content
How to download and install Android – Chromebook applications?
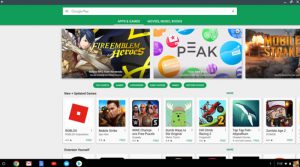
The download and installation process is the same as on the Android device. The appearance of the Play Store will change like on a tablet. Apps work as usual. Apps use a tablet user interface if the developer has enabled it. Otherwise, it scales to fit the larger Chromebook screen.

- Step 1. To install the application, select it in the store, click on the “Install” button.
- Step 2. The application will start to install, and during the process, an authorization request may appear. In this case, confirm authorization. When the program is installed, it will appear in the list of applications Chrome OS. Click on the icon to launch.
Manage Android – applications can be managed in the same way as programs for Chrome OS. The controls are in the upper right corner, the arrows for navigating the application are in the upper left corner.

Note: some applications may be portable. This means that you can work with them without installation. This way you can find out if the program is right for you or not before proceeding with the installation.
to the content
Disadvantages of Android – applications
Quality Android – apps on different chromebook models may vary. For example, if you have touch screens, it is most convenient to work with applications for Android. Especially if it's a 2 in 1 Chromebook. System components like the accelerometer make it easier to play and perform other tasks.
Chromebooks have come a long way since their inception, but that doesn't mean that any Android – program will run fine on older models. You need to try and see for yourself.
