Operating systems Android are becoming more optimized and practical every year, ensuring efficient device operation with minimal expenditure of procedural resources. But this is not enough for a modern user. He wants to 'squeeze' the maximum potential out of the gadget, so such a topic as root rights to Android 6 does not lose its relevance.
Why root your phone
Obtaining superuser rights, or rooting, is a simple process, the result of which can bring additional comfort to the work with the gadget. Initially, after purchasing the device in the store, the rights of an ordinary user are available. However, you can uninstall some applications and install new ones without affecting your overall health score. Root rights greatly expand the user's capabilities.
The main advantages of rutting include the admissibility of any manipulations with the device firmware.
After receiving root access, you can remove ads from applications, make edits to standard services and system files, change the appearance of the operating system, and also affect the overall performance of the device. By making responsible changes to the standardized set of software tools Android 6 Marshmallow, the user is able to increase battery life, free up additional space on the phone and take the load off the RAM that was previously clogged with support for unnecessary software.
to the content
How to check for superuser rights
If you are the first owner of the device, your device is definitely not rooted. But if you took the phone off hand, it is better to check. It shouldn't take long as there are enough programs on Google Play to check root rights for Android, one of which is Root Checker.

After installation, you need to open the application and tap 'Verify Root '.
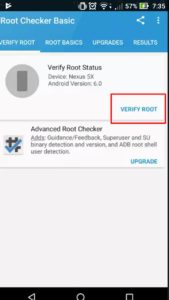
If you have superuser rights, the following message will appear:
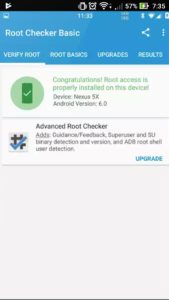
Even if there was no superuser access on your device, you should not uninstall the application – later it will help to quickly determine the presence of administrator access for certain methods used to obtain these rights.
to the content
How to get the
It is not difficult to become the superuser of a device based on the operating system Android Marshmallow. All you need to do is get Chainfire's SuperSU program, but it's important to note that Google has moved to security via SE Linux. Therefore, before rooting, you need to modify the Boot image using the ADB and Fastboot commands and install the modified TWRP recovery. Only then will you be able to install the latest version of SuperSU.
to the content
Using the new version of SuperSU
Of course, it is not as easy to get root rights to Android 6 as to earlier versions of the operating system – two new commands have to be written in the Boot menu – 'adb reboot-bootloader' and 'fastboot flash boot boot. img '. But this does not mean that an ordinary user cannot cope with this task. For example, you can easily find modified Boot images for Nexus devices by following the link. It is noteworthy that only after modifying the image, you can proceed to the next stage before installing SuperSU – to work with the new version of TWRP recovery.
to the content
Installing the latest version of TWRP
Having dealt with the Boot menu, you will be faced with the task of integrating the updated TWRP recovery into the device. Unlike the standard recovery offered by Google, also from the options that the developers of branded gadgets have worked on, TWRP has a more user-friendly touch interface. This utility is more powerful than its factory counterparts and allows you to make full backups of the entire system.
If you want to root Android 6 using SuperSU, you will need to upgrade with this software. You can download the latest version of TWRP recovery on the manufacturer's official website. There you can also choose a recovery directly for your device.
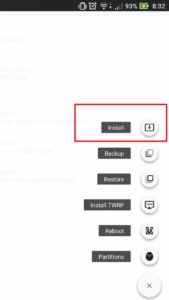
A special TWRP Manager program will help you install TWRP.

With the help of this software on a smartphone or tablet, it will be possible to quickly install the downloaded archive from the recovery.
to the content
With SuperSU
After completing all the above steps, modifying the Boot and replacing the factory recovery with TWRP, proceed to install SuperSU. The program can be downloaded from the web or from Google Play – for free.
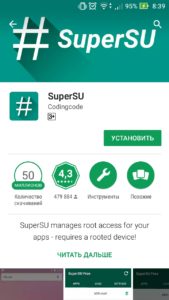
After installing the application, an intuitive menu will open, which will allow you to easily manipulate all the services and applications preinstalled on the device, including system ones. 
If you did not do any manipulations with the Boot menu and recovery, but immediately installed SuperSU, the program will inform you that you do not have administrator rights and will offer possible solutions to the problem.

to the content
Rooting Samsung
The South Korean company Samsung has taken a leading position in the market in the field of creating multifunctional gadgets based on the operating system Android. The flagships of the corporation are distinguished by their attractive design and the presence of modern developments in each subsequent version of the device. But practice shows that there is no limit to perfection, so quite often users turn to rooting gadgets of a well-known brand. In particular, the lack of space in the internal memory should be attributed to the main reasons for the desire to get root rights to Samsung devices.
to the content
Using CF Auto Root
The CF Auto Root software is created by a user known on the network under the nickname Chainfire. The main feature, thanks to which the installation of root rights on Android 6 using CF Auto Root differs from similar methods, is complete security. That is, the file that serves as the basis for the firmware contains a modified cache and a script for installing an optimized recovery. This method of obtaining superuser rights does not concern operating system vulnerabilities, but only correctly injects the 'SU' file into the '/ system / xbin' section, and the 'Superuser.apk' file into the '/ system / app' folder.
To successfully root a Samsung smartphone or tablet using CF Auto Root, you must:
- Download Samsung drivers on your PC from the link and install them.
- Download and install the Odin flasher from the link.
- Download a file that will help you to get superuser rights from the link.
To root, just follow these steps:
- Put your phone into download mode. To do this, turn off your smartphone and simultaneously press the 'Volume Down', 'Center' and 'Power' buttons.
- After the system message appears, release the pressed keys and click 'Volume up'.
- Connect your device to your computer and run the Odin program.
- In the window that appears, in the PDA / AP field, select the previously downloaded CF-AUTO-ROOT, indicating the direction to it, and press the active 'Start' button.
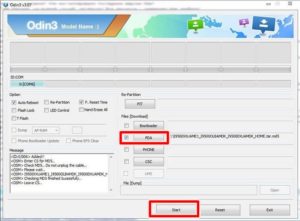
After waiting for the unpacking to finish and restarting the device, you can enjoy superuser rights on your Samsung tablet or smartphone running OS Android 6.0 Marshmallow. It is important to understand that any actions with the firmware are performed at your own peril and risk. As practice shows, Samsung devices can glitch and crash after installing root-rights. In rare cases, the IMEI code flies. To fix everything, you will have to reinstall the service firmware.
to the content
On the Nexus
The Nexus Root Toolkit program will help you to obtain superuser rights on Android 60 in Nexus gadgets. Its rich functionality allows you to unlock / lock the bootloader, flash kernels, install patches and make various changes to the operating mode of the device. In this case, the application is often used only for rooting.
to the content
Getting Root Rights with the Nexus Root Toolkit
The process of gaining administrator access to Nexus gadgets when using the Nexus Root Toolkit software involves the following procedure:
- Download and install the program from the official website on your PC.
- Connect your device to your PC and enable USB debugging.
- Remove the block from Bootloader.
- After opening the program, click the 'Root' button by checking the box next to the 'Custom Recovery ' item.
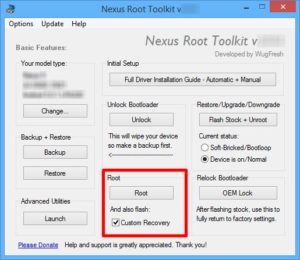
- Wait until the end of the installation (the device will reboot several times during the unpacking process).
to the content
Removing root
Removing root rights is a popular topic among users Android – devices. The reason for the elimination of superuser rights may be manifested inhibition of the device, vulnerability to viruses, a desire to sell a gadget, and much more. It is enough to install the file manager 'ES Explorer'. This implies the erasure of some files, which are easiest to reach with the above software. It is necessary to delete the files 'SU', which are located in the folders '/ system / xbin /' and '/ system / bin', as well as the file 'Superuser.apk' located in the directory '/ system / app /'.
to the content
