 In this article, we will describe in detail how to create a small application for Android and an Arduino sketch so that this application for Android can be connected to the Arduino via Bluetooth and at the same time execute commands.
What do we do
So, we will create a mobile program that will connect to the wireless module of our 'robot' and send a command. The sketch for this command will turn on or off one of the LEDs installed on the Arduino.
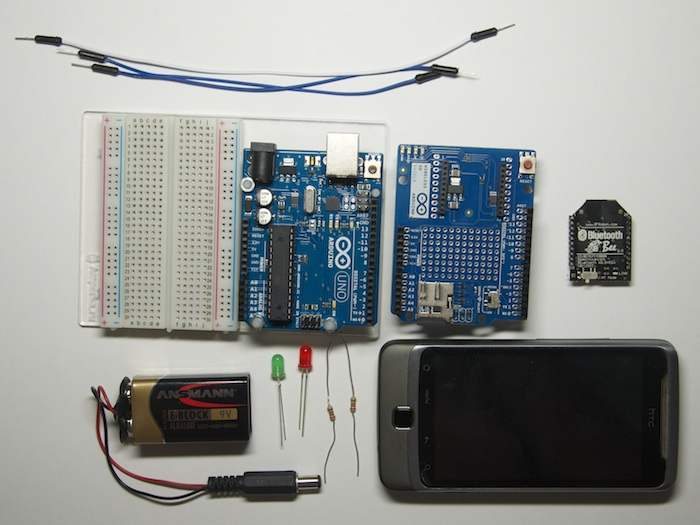
What will we use:
- Arduino Uno.
- Bluetooth Bee.
- Arduino Wireless Shield.
- Green and red LEDs.
- Resistors.
- Breadboard Half.
- Daddy-daddy wires.
to the content
We create a mobile application
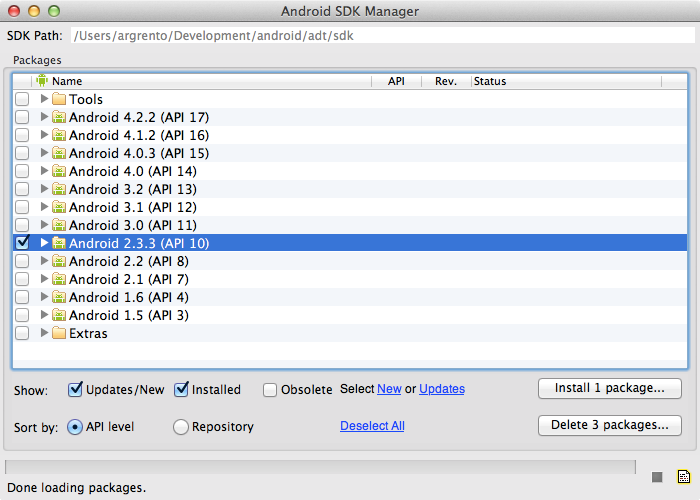
Application development for Android is done in Android Development Tools. It can be downloaded from the Google portal at the following link. After downloading and installing, launch ADT. Then you need to download Android SDK of the required version. Choose the same version that you have on your smartphone. Our experimental old phone has version 2.3.3, which we will choose. Click on 'Install_Packages' to start the installation process.
After completing the previous operation, you need to create a program. Click on 'File-> New-> Android Applications Project' and fill in the existing fields.
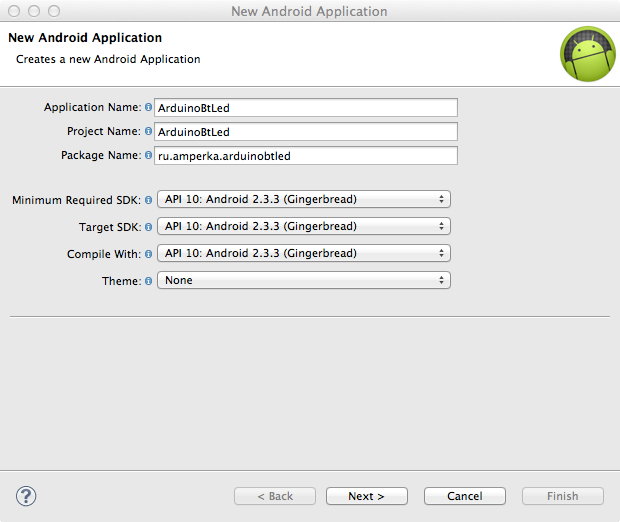
Application Name – the name of your program, it will also be displayed on Google Play.
Project Name – the name of the project in the development environment.
Package Name – application id. It should be composed according to the following logic: the name of your website backwards + the name of the program.
In the remaining three drop-down lines, you need to select the version of the used Android – gadget.
Set the 'Theme' field to 'none' to get rid of compatibility issues in different SDK versions.
Let's move on to the next step by clicking on 'Next'.
Uncheck the 'Create custom icon' box so as not to waste time creating an icon for our application. Click on 'Next'.
In the new window, you can leave the 'Activity' view: this is the view that will be on the screen when the program is launched. Let's choose 'Blank_activity' to start from scratch. Click on 'Next'.
Our application will have only one Activity window, so in the new window you can leave everything as it is and select 'Finish'.
At this point, the application is created.
to the content
Configuring the emulator
Debugging can be done on a real device or on an emulator. Let's take a look at the emulator option and configure it.
To do this, click on 'Window -> Android _ Virtual_Device_Manager' and tap on 'New'. Fill in the fields in the window. The selected values determine how many resources the emulator will give to the virtual phone. Then click 'OK'.
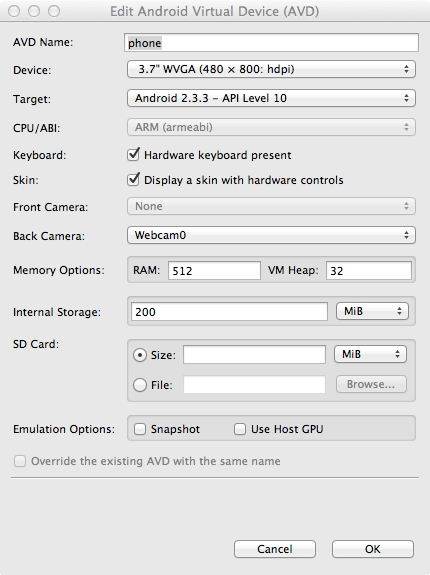
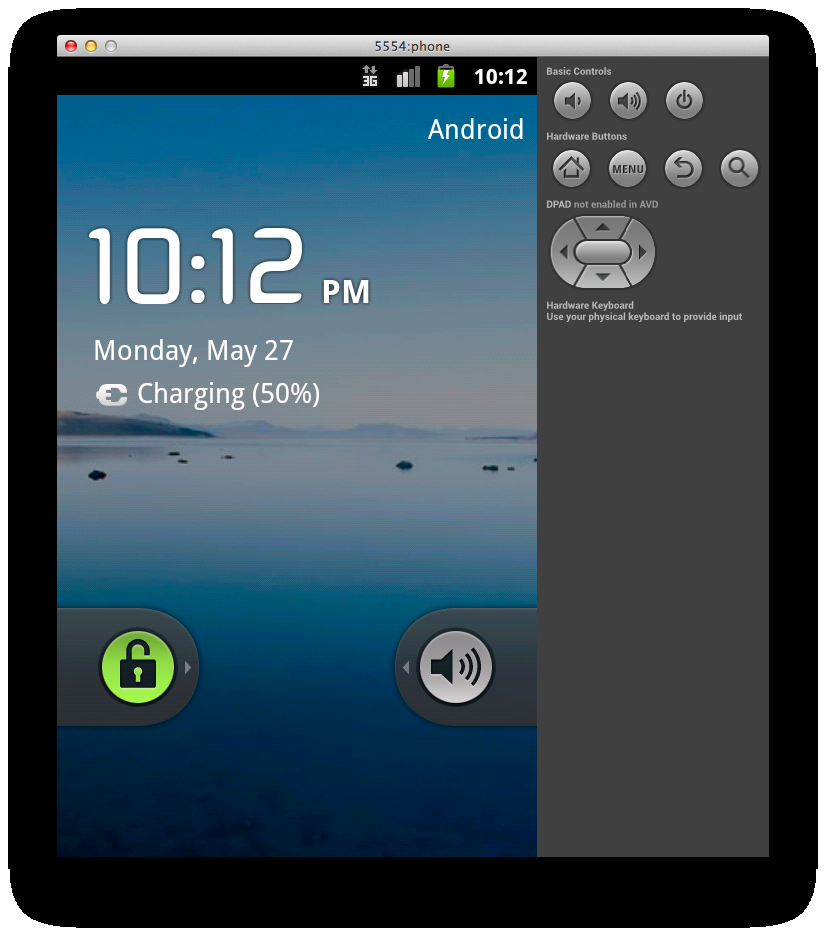
In the AVDM window select 'Start', after which the emulator should start. The procedure may take several minutes depending on the power of the PC. When finished, you should see the desktop, just like on a smartphone.
to the content
Filling Activity
On this screen we will have 2 buttons: 'turn on red LED' and 'turn on green LED'. In order to add them, you need to open 'res / layout / activity_main.xml' in the 'Package Explorer' panel.
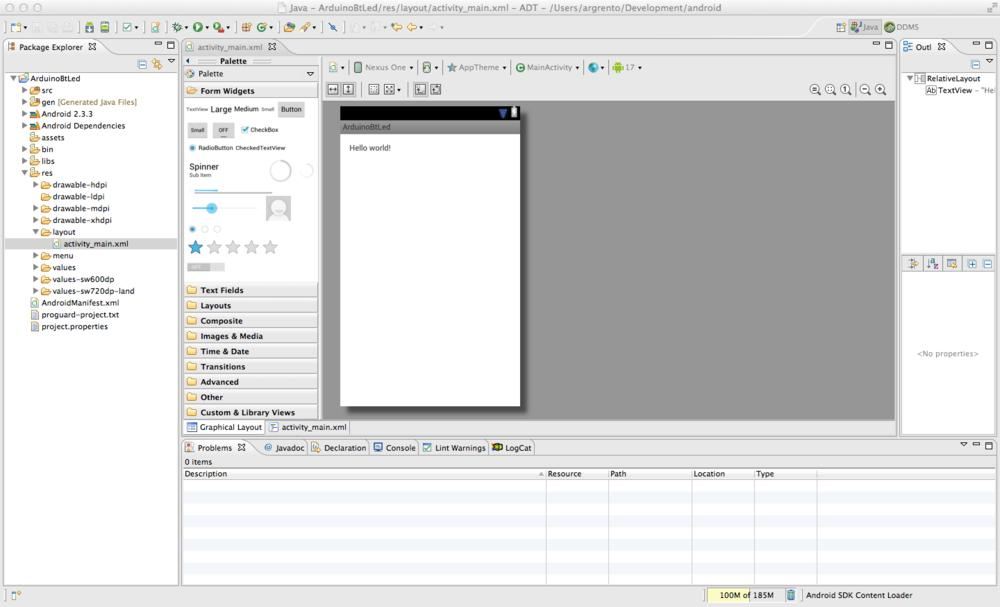
Drag the buttons (2 pcs) 'ToggleButton' to our form. After that, switch to the 'activity_main.xml' tab and see the following code:
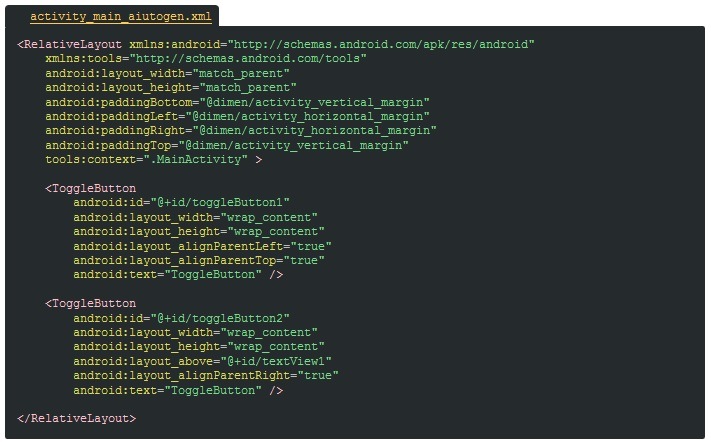
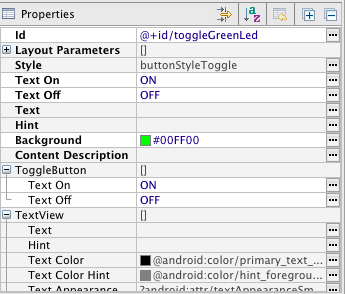
Let's change our component names to make it clearer. The android: id fields will be changed in the following way.

We will also add signatures. Let's change the text size and color. The final code will look like this.
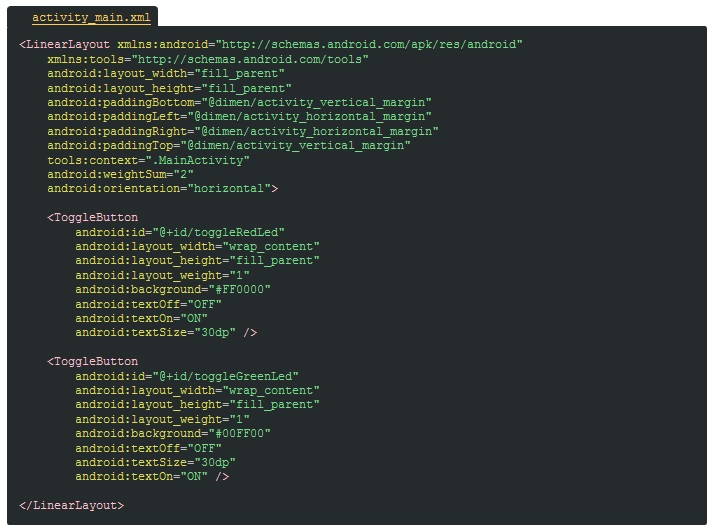
The changes made can also be made in graphical mode by selecting the 'Outline / Properties' tab.
to the content
First start
Open the run settings by clicking 'Run -> Run Configurations', on the left side, click 'Android Application'. 'New configuration' will appear. On the right side of the window, select the 'Target' tab and click on 'Launch_on_all_compatible_devices / AVD'.
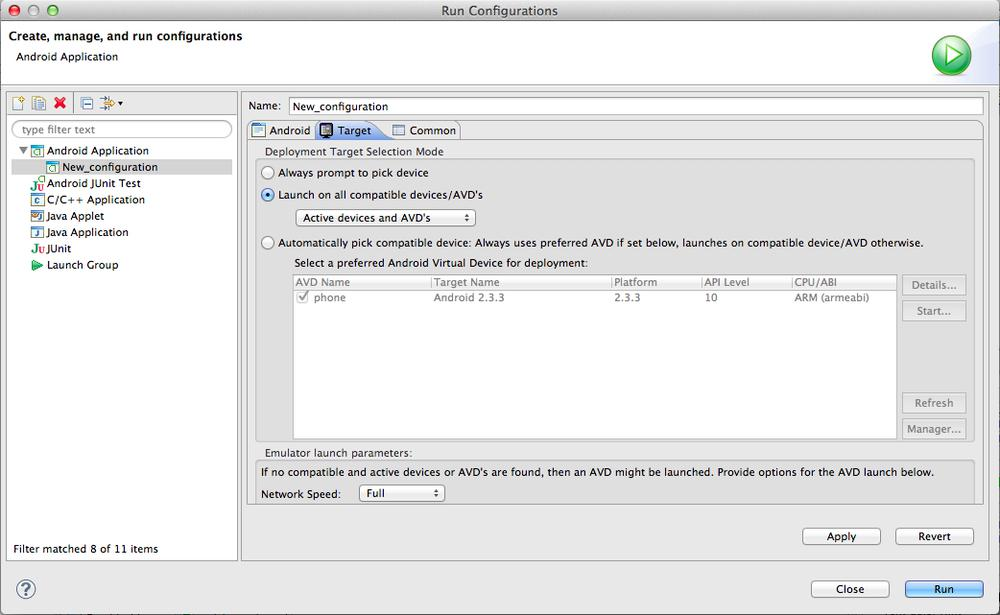
Click on 'Apply' and then on 'Run'. The program will open in the emulator.
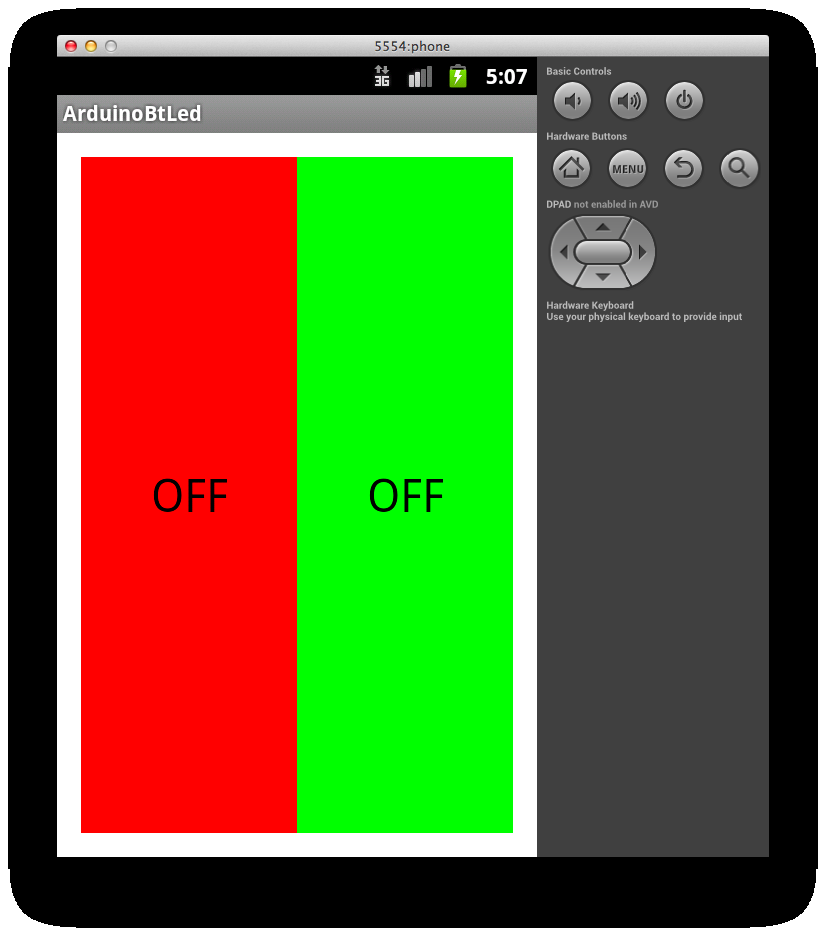
At this stage, we can only test the appearance. It remains to write a click handler.
to the content
We write the code for Android
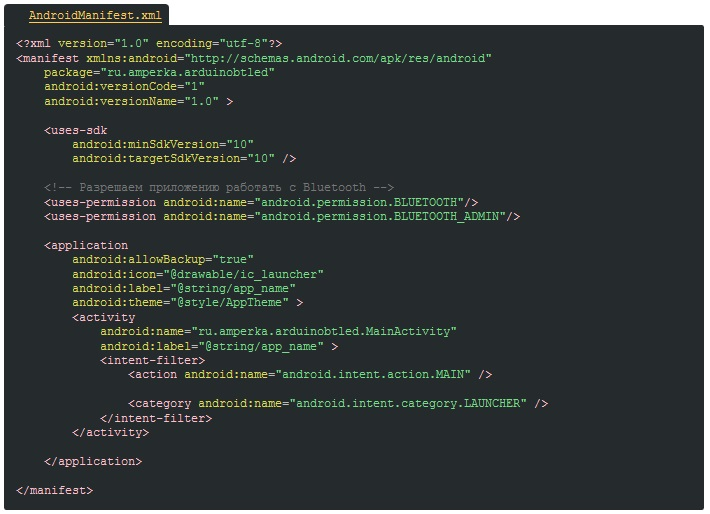
If you know, each application must notify the system of the rights it should grant it. The list of rights is in the manifest file named 'Android Manifest.xml'. In this file, we need to specify what to use Bluetooth. You will need to add a couple of additional lines to the file.
to the content
Writing the main code
Let's open the file 'MainActivity.java'. It already has the code in it.
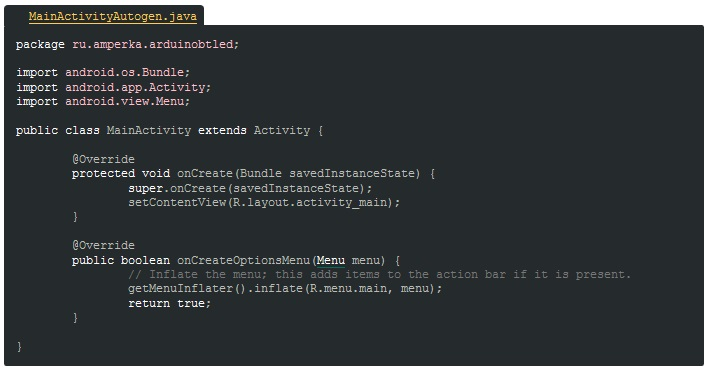
We need to add commands to it:
- Activation Bluetooth.
- Handling button clicks.
- Sending information about the pressed button.
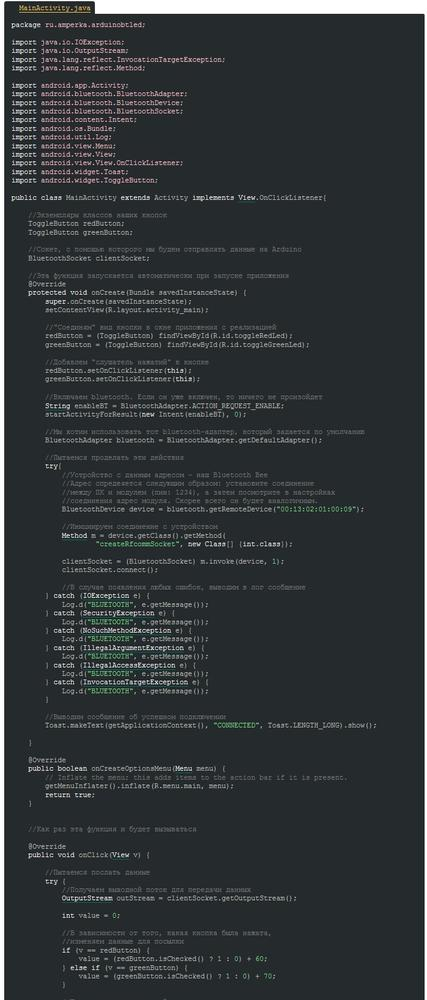
We will send 1 byte with a number (two-digit) to the Arduino. The first digit is the pin number to which the diodes will be connected. The second is the state of the diode (1 – active, 0 – inactive).
The number with the command is calculated by the following method: if we press the red button, then the number 60 is taken (for the red light we select the 6th pin of the Arduino) and 1 or 0 will be added to it, depending on the state of the diode.
For the green one, everything is the same, only instead of 60 we take 70 (we connected it to the 7th pin). As a result, we get 4 of the possible commands: 70, 71, 60, 61.
The code that implements the written will be as follows:
to the content
Writing a sketch
Bluetooth – the module receives data via UART at 9600 bps. The wireless module itself is immediately ready for use, so there is no need to configure it. The sketch, in turn, should be able to:
- Receive data via UART.
- Activate the required diode depending on the received code.

to the content
Features of sketch filling
To associate Bluetooth – bee with the controller, all the same pins (1 and 0) will be used as for the firmware itself. Therefore, when writing the controller code, the 'SERIAL_SELECT' switch on 'Wireless_Shield' must be set to the 'USB' position, after flashing it must be returned to the 'MICRO' state.
to the content
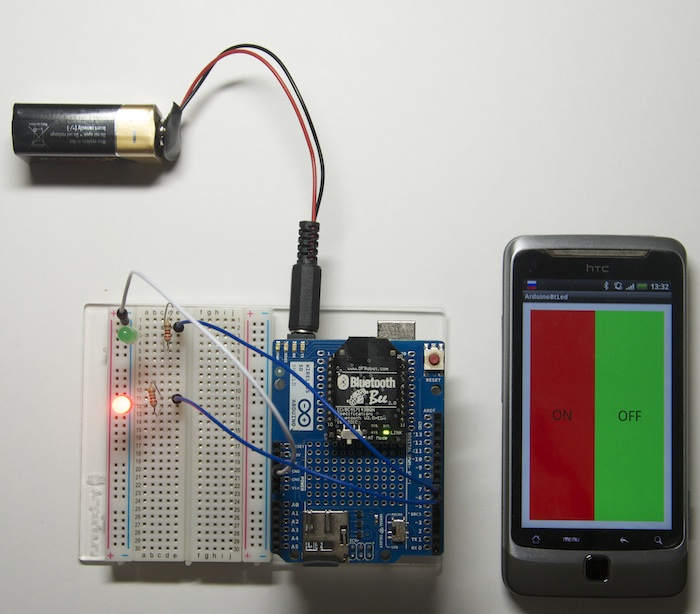
The resulting result
As a result, we get such a picture.
to the content
Output
In our article, we described how to create a small application Bluetooth robot control for Android, which, on command, lights up the lights through the blue tooth.
This is the easiest thing to do with a given chip. Arduino is convenient in that on its basis you can assemble a variety of robots with limited functionality without any soldering, but only by connecting the necessary modules. Having basic knowledge of programming, you can independently create an application for more complex systems, for example, Bluetooth rc car for Android, through which you can control a radio-controlled car, or any other device from your phone , which you will make yourself.
to the content