Many people use Google Photos because it is convenient and safe. By security in this case, I primarily mean backup storage of photos, which is very important for everyone. Few people want to lose precious footage taken on vacation or elsewhere. However, few people know that Google Photos has a lot of useful features. Almost no one uses them, but it was not in vain that the experts from Google tried? Let's see what they have in store for us. Literally on the fly, I found 10 examples of such life hacks, of which there are actually even more, but let's start with the most interesting and useful ones.

In fact, Google Photos is a very powerful photo tool.
- Search images by topic
- Grouping photos by faces
- How to edit similar photos in Google Photos
- Editing Google Photos photos in apps
- Viewing the original photo after editing
- Google Lens in Google Photos
- Store any photos in Google Photos
- Share Google Photos with others
- Google Photos Photo Scanner
- How to hide photos in Google Photos
Search images by topic
Immediately on the main page of the service, you can find photos by topic. To do this, simply enter the desired word in the search bar. The service will automatically display those photos that, in its opinion, fit this request. They are already indexed in advance and the system immediately understands what needs to be issued upon request.
Sometimes the system can make mistakes, but the possibility of such a search is still convenient and more than once helped me out when I had to find what I needed in a heap of photos. True, only simple queries work, like “cat”, “house”, “car” and so on. If you write something very complex, the system will ask you to simplify the task, and if something is too general, like “water”, then literally everything will stand out.
Grouping photos by faces
This function is very convenient, but in itself it does not surprise anyone, especially when everything is left to the mercy of neural networks, which constantly “wool” and analyze everything. They are also capable of handling photographs, but the problem is that this does not work in every country.

Even the Google Photos splash screen hints that people are important.
If in your case the function is not supported, you just need to turn on the VPN and select the US region. After that, on the Google Photos settings page (both in the web version and in the mobile version), the item “Grouping similar faces” will appear. Inside, you only need to give the service the necessary permissions. Then the VPN can be turned off and everything will work in any region.
The function is very convenient, but it won't work right away. The service will need time to analyze all the photos. This usually takes several hours. Depending on the number of photos.
When the analysis is complete, the “Faces” item will appear in the “Albums” tab. There you can find grouped photos. For each found person, you can set a name, so that later it would be easier to find them by searching. Mistakes are possible, but it's still easier than looking for everything yourself manually, scrolling through the endless tape.
How to edit similar photos in Google Photos
Those who edit photos in Google Photos have to deal with the same type of photos that have to be processed anew each time. To make it easier to work with such images, you can simply copy their settings and transfer them to other photos of the same type.

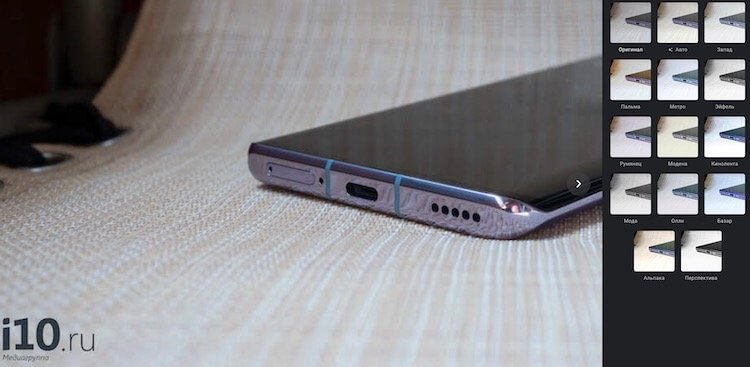
Editing tools can come in very handy.
To do this, when editing in the web version, press the “Ctrl + C” key combination. Then go to a new photo and press “Ctrl + V”. The settings will be copied to the new photo and the work will be much faster.
Editing Google Photos photos in apps
Not everyone knows, but the mobile version of the Google Photos app allows you to edit photos in third-party apps. This is convenient when the functionality of the built-in editor does not suit you for something.
To do this, you just need to open the photo, click on three dots in the corner of the screen and select the “Edit in …” item. All edited photos in third-party editors, if they were opened from Google Photos, will be automatically saved.
Viewing the original photo after editing
If you've edited a photo and want to see how it looked before you made the change, Google Photos gives you that option.
If you are using the web version, you just need to hover the mouse cursor, click on the photo and hold it. As long as you keep the button pressed, you will see the original version. When released, the edited photo will return again.
In the mobile version, everything is about the same, but you will have to hold your finger on the photo.
Google Lens in Google Photos
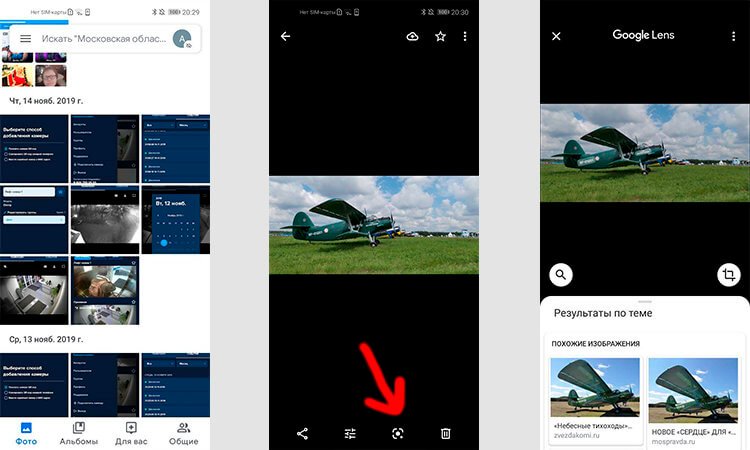
There is a service that can recognize what is shown in a photograph or is simply in the camera lens. It is called Google Lens or Google Lens. With it, you can learn a lot about the object in front of you and even find it on the Internet.

This is how Google Lens works.
Google Photos has the ability to work with such an assistant. This is very convenient and makes it much more convenient to use such a search tool from Google. To use the tool, you just need to open the photo and click on the Google Lens icon below it.
Store any photos in Google Photos
Many people know that Google Photos can store any number of photos if you agree to the optimization of the size. This is not a problem, since the quality hardly drops, but you get really unlimited storage.
In addition to photos from a smartphone camera, which are automatically uploaded, Google Photos can also store photos uploaded from a computer, regardless of what they were taken with.
You can also store photos from social networks and even instant messengers. To do this, you just need to select the necessary folders for synchronization by going to the “Startup and synchronization” and “Folders on the device” section. You can even sync a folder with screenshots.
Share Google Photos with others
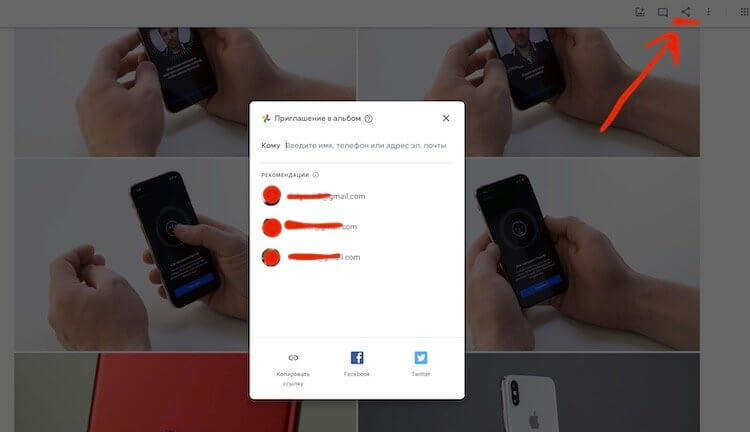
In Google Photos, you can share not only individual photos, but entire folders or albums. To do this, you just need to create an album, if it does not exist yet, and select “Share” in the drop-down menu. In the web version, this is called “Album Access”. As a result, the user can access the photos in this folder.

Sharing albums is easier than it sounds.
And if you go to the “Shared Albums” section and select the “Configure Shared Libraries” item, then following the further recommendations, you can give your partner access to your entire media library. True, this way you can select only one user who will have access to ALL photos.
Google Photos Photo Scanner
You don't need to run a separate application to scan photos. You just need to open Google Photos, open the extended menu in the upper left corner and select “Photo Scanner” there.
The Google application will open, after which you just need to scan the image and it will be saved in Google Photos. This makes it very convenient to scan photos.
How to hide photos in Google Photos
Google Photos lets you hide any photo. This can be used for when a stranger will view the photos on your smartphone.
In order for no one to see too much, you just need to send the photo to the archive. It will be available to the user in the archive folder, but an outsider will not see it in the general stream of photos.
If you have something to add and want to tell you about the functions that you like to use in Google Photos, write about it in our Telegram chat.
