 Even a perfect operating shell like Android can fail. In this essay, we will take a closer look at the problem in Android getting a Wi-Fi IP address.
Eliminating the problem
Let's describe the main causes of the problem and how to fix it.
to the content
Software crashes
The first possible reason for this trouble is a software error on the gadget itself. The solution is to reboot or reset the settings to factory settings. This is done from the 'Restore and Reset' menu, which can be accessed via 'Settings'. To reset, you must confirm the operation. More details on how to Reset settings are described in another article. 
You can also try downloading a special Wi-Fi Fixer utility to fix the problem. After downloading and installing it, you need to restart your mobile device, run the utility and go to the 'Known' tab. 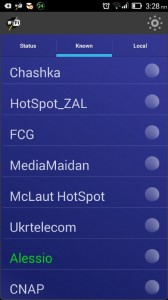 Then try again to connect to the required router (the available connection will be highlighted in green). Based on the feedback from the people who have used this application, it is very effective in solving these kinds of problems.
to the content
Setting the IP address
The second reason when the Internet does not connect is in the IP address itself. To fix the problem, you need to turn on the radio module. Then go to the connection settings and delete it. 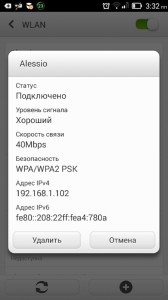 After that, select the desired connection point again, click on the 'Advanced' button, additional parameters will appear.
 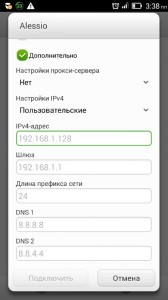 Then you need to click next to the item 'Ipv4 Settings' – 'Custom'. In the table, you must enter the values in this order:
- Enter any value starting from 100 in the IP-address line.
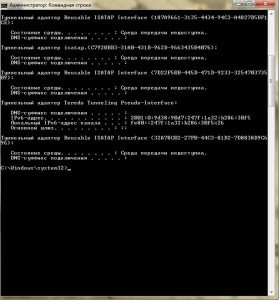
- In the 'Gateway' line, enter the address of the router. To find it, you need to open 'Start' on the left side, enter CMD in the search line, then type 'Ipconfig' in the command line. Among the huge number of numbers and letters will be the address of the router. The operation must be performed with administrator rights.
- Nothing needs to be changed in the 'Prefix' line.
- In the line DNS1, you need to enter the values provided by the provider.
- You do not need to change anything in the DNS2 line.
to the content
Change device and service settings
The next way to fix the problem of obtaining an IP address when connecting to Wi-Fi on Android is a special button on the router or in the control menu. If you do an operation using the device control menu, you need to enter it (in devices of different manufacturers this is done differently), then go to the very bottom – 'System Tools', there will be several submenus:
- 'Reboot'.

- 'Factory settings'.

The latter should be used only in extreme cases, because after activating this option, you will have to reconfigure the router.
to the content
Checking DHCP Server Settings
The fourth way to eliminate the error of obtaining an Android Wi-Fi IP address is to check the DHCP server settings. This can be done from the same device control menu, along the path 'DHCP' – 'DHCP Settings'. In the line 'DHCPserver' there should be a button in the 'Enable' position. 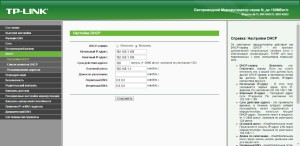
to the content
Configuring Services
To do this, go to the 'Control Panel', enter 'Services' (Slugbi) in the search bar, then 'View local services', a table will appear where you need to find 'DHCP client' in the column 'state' should be 'running', and in column 'Startup type' – 'automatically'. 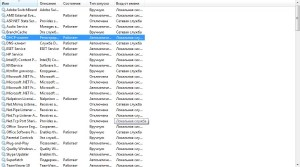 So, we have analyzed the main options for solving problems with the IP address on Android devices. If none of the above methods helped, then it would be better to take the router, phone or tablet to a specialized workshop. Do not postpone: if the device is still under warranty, chances are good that it will be repaired free of charge.
to the content
