Protecting yourself and your privacy is a basic instinct for today's internet user. Of course, for some, this instinct is completely atrophied, but for those who have at least once faced the theft of their data, it cannot be turned off. These people start looking for any ways to protect themselves, download all kinds of password managers, VPN services, stop connecting to public Wi-Fi networks and check the web pages they open with antivirus for fear of phishing. But there is a more reliable and simpler way.

Google Chrome can be protected with DNS-over-HTTPS
Google Chrome has a special mechanism called DNS-over-HTTPS. He is responsible for encrypting the data about clicks on websites, transmitted to the provider, who processes them and redirects them to their destination. By default, this traffic is not encrypted in any way, allowing hackers to track your requests and use this to implement fraudulent schemes. For example, substitute a phishing page for the one you actually wanted to open. Many do not notice this and enter their data on such sites.
Traffic encryption in Chrome
DNS-over-HTTPS is available in both desktop and mobile versions of Google Chrome. Let's sort it out in order how to enable it:
- Start the desktop version of Chrome and go to 'Settings';
- In the 'Privacy and Security' section, find the 'Advanced' tab;

Desktop Chrome has had this feature for a long time.
- Here enable the 'Use secure DNS server' option;
- Select your DNS provider (I have DNS from Google).
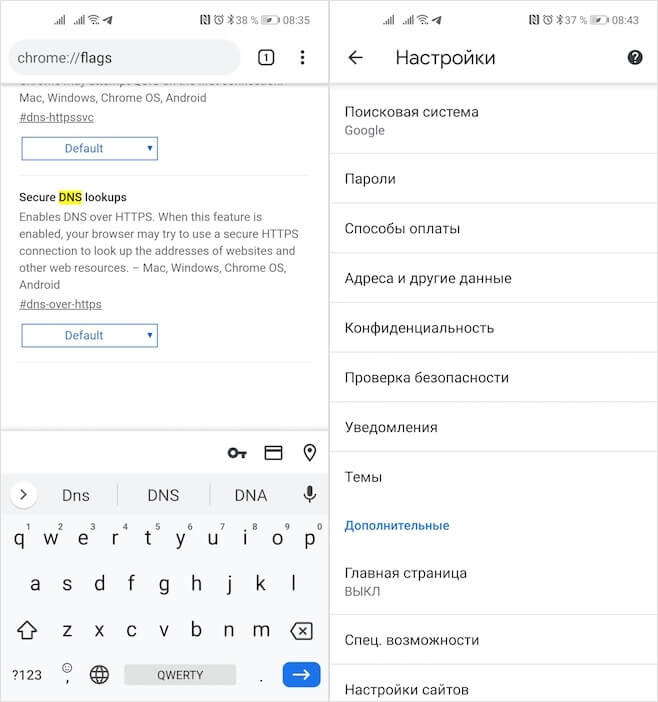
Although the DNS-over-HTTPS mechanism has been around in Chrome for a long time, some users may not have it by default. This happens if you have previously enabled this option in the experimental features menu. Therefore, it must be disabled so that a conflict situation does not arise. To do this, go to chrome: // flags, find the DNS-over-HTTPS parameter and select Default in the drop-down window opposite. Then restart your browser by pressing the blue Relaunch button and go back to 'Settings'.
Secure DNS in Chrome
In mobile Google Chrome, the DNS-over-HTTPS mechanism only appeared this week. Apparently, Google considered that phishing attacks targeting users Android were not uncommon. Therefore, do not neglect the activation of the protective tool.
- Launch Chrome on Android and go to chrome: // flags;
- Find and enable the Secure DNS lookups option;
On Chrome Android, DNS-over-HTTPS is not yet available to everyone
- Go to 'Settings', find the 'Use secure DNS' item and enable it;
- Select the desired DNS provider and save the settings.
By and large, there is nothing complicated here. However, it should be borne in mind that Google is rolling out the mobile Chrome update, which includes the DNS-over-HTTPS mechanism, gradually. Therefore, it may not be available to some users, and even forced activation of the corresponding flag may not correct the situation. In this case, it is recommended that you temporarily use a VPN service. But keep in mind that you only need to choose the paid one, because the free ones for the most part just drain your data to the side.