 On Android devices, when connecting to Wi-Fi networks, various problems may arise. We want to show you how to troubleshoot Wi-Fi on Android devices, or, if necessary, on the routers to which you need to connect.
What situations will we consider
We will consider problems with connecting to a home router, since in this case it is possible to adjust the settings of both the router and the mobile device.
to the content
Solving problems when connecting to a router
There are situations when with Android – the smartphone cannot connect, and instead the inscription 'Receiving IP address' is constantly displayed.
If there were no problems before and the same devices were used, try connecting to the network any other device that has a Wi-Fi module: if it connects successfully, then the problem is in your Android, if not, then you need to configure the router itself.
After you have established in which device the problem is, first we advise you to simply restart the faulty gadget. There may have been some minor configuration glitch.
Note: instead of turning off your smartphone, you can simply activate airplane mode and then return to normal mode.
In this case, all communication modules will be disconnected and reactivated, which also happens when the device is rebooted. This will save you time.
If such actions did not solve the problem, we suggest doing the following.
to the content
Authentication issues
If, when trying to connect, you see the words 'Authentication error' and after that 'Disconnected', try to re-enter the password from the network, because this status indicates a mismatch of the given code with the one entered on the smartphone. entering a password.
to the content
Installing third-party utilities
One of the easy solutions to fix the problem with Wi-Fi is to install the Wi-Fi Fixer application on your smartphone – it is available for free in Google Play. To use it, you do not need to additionally understand its functions, just download and run it, after which you can simply minimize.
All the main functionality of the application works automatically: the utility corrects the system parameters to achieve a successful connection to the point and ensure a good signal, and also fights constant interruptions, correcting the causes of these failures.
And this article contains information and instructions on how to use several more interesting and useful Wi-Fi applications for Android.
to the content
Channel change
We recommend that you try changing the channel on which your router is broadcasting. Perhaps, other wireless networks have appeared near you, and if the channels coincide, problems may arise, and in such a situation, some devices may successfully connect, while others may not.
In this case, you need to make settings via a PC connected by cable, or via Wi-Fi to an access point. For this:
- Run any browser installed on your PC
- Write 192.168.1.1 in the address line. and press '
- If asked to enter a username and user code, write in the fields.
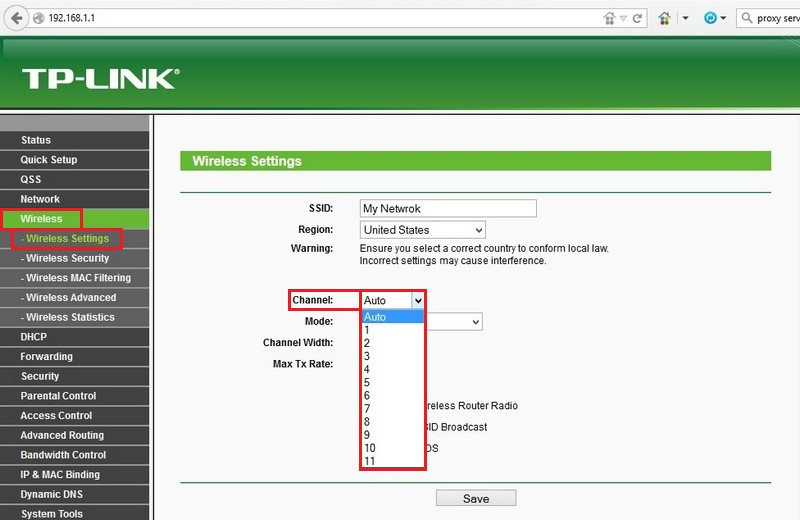
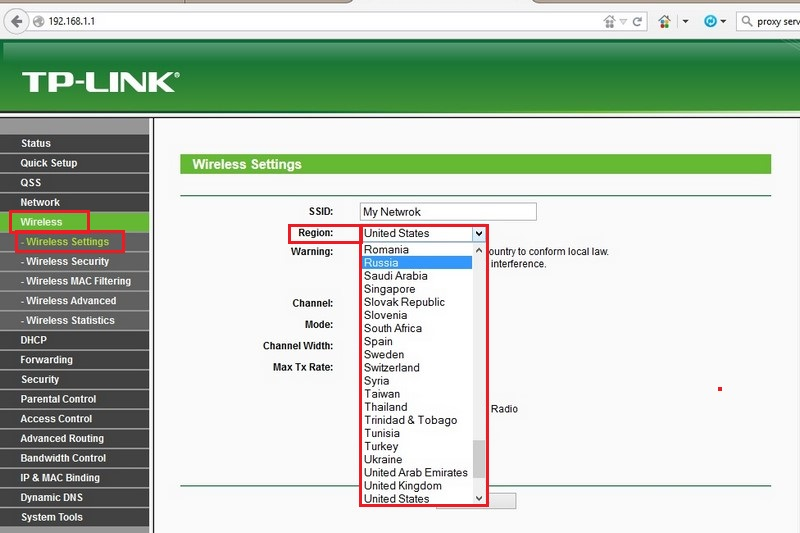
Then, on TP-LINK: - Click on 'Wireless'.
- Further 'WirelеssSettіngs'.
- In the window that opens, in the 'field, try changing the number to any other.
To Asus
- Go to 'Advanced Settings'.
- Then go to 'Wireless & networks'.
- In the window that appears, in the 'Channel' field, change the number to another.
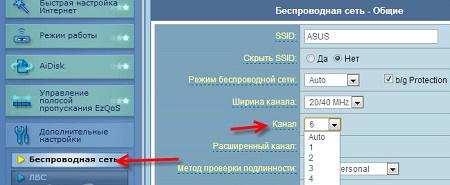
Note: no matter what company you have an access point, after changing the number, save and reboot the router, and then try to connect. We advise you to try several different options for setting the channel.
to the content
Set proxy server settings
Another option is to check the proxy server settings on Android: for most situations, the settings should not be set manually. Therefore, go to the smartphone menu and do the following:
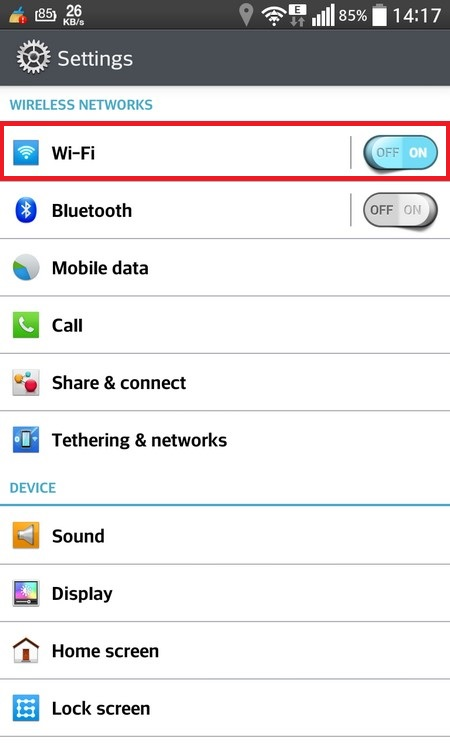
- Open the settings.
- Select 'Wi-Fi'.
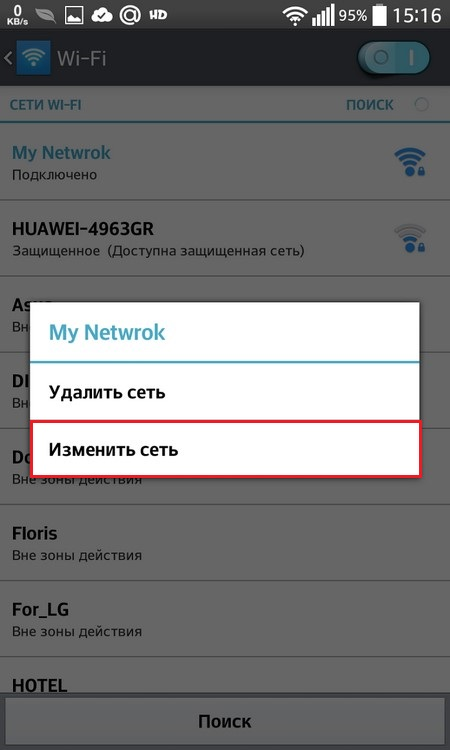
- Tap on the name of your connection.
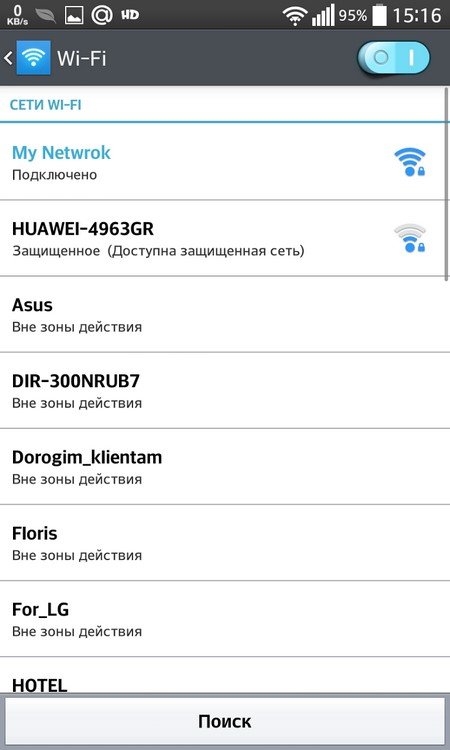
- Click 'Change Network'.
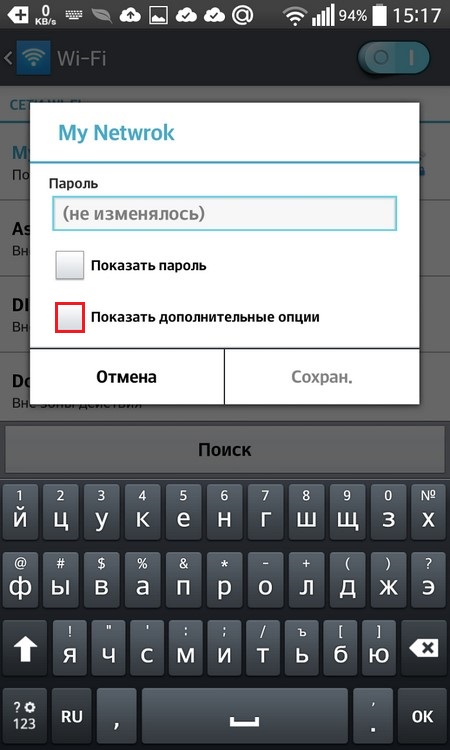
- Check the 'Show advanced options' checkbox.
- Make sure there is No under the 'Proxy Settings'.
- We also advise you to pay attention that under 'IP Settings' is 'DHCP'.
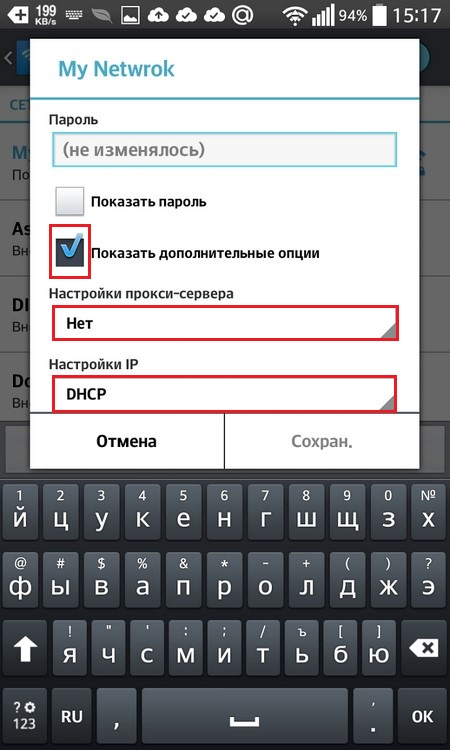
- After these steps, enter your network password and select the 'Save' button.
to the content
What to do if WI-FI does not turn on on Android: Video
to the content
Changing the standard
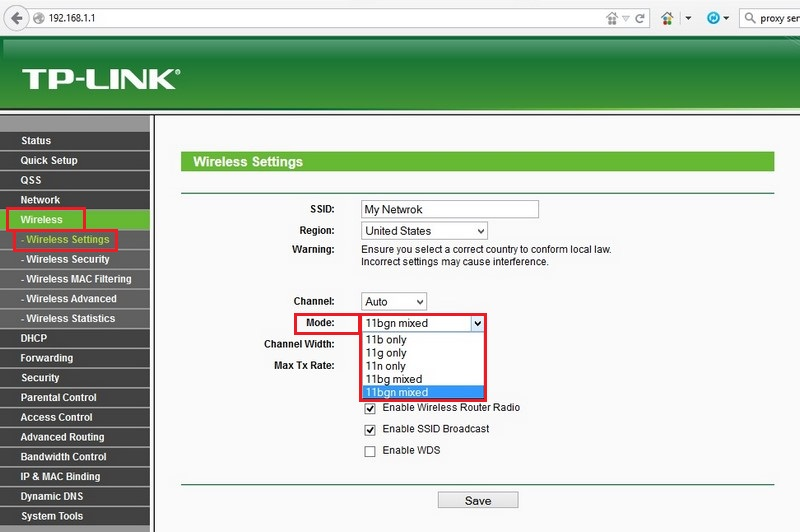
Changing the Wi-Fi standard on the router will also help fix the Wi-Fi problem on Android. The fact is that the smartphone itself may not support some standards, which will prevent it from successfully connecting to the network. To do this, we suggest making the following changes using the example of TP-Link:
- Follow steps 1 through 5 as described for the channel change procedure.
- In the 'Mode' field, try items such as 11 or 11g, 11n only: after each change, press the 'e' button and try to connect your device to try all the options exactly.
to the content
Additional Tips
Here are a couple more tips for fixing Wi-Fi connection problems.
- It is worth trying to change the regional settings on the router: it is possible that some Android devices, especially from little-known manufacturers, may be sensitive to this. To do this: Repeat steps 1 to 5 of the channel editing instructions Change the 'Region' field to the one you are actually in now.
- We also recommend trying to check if your phone works with other (open) Wi-Fi routers, but keep in mind that this method should not be considered as the main indicator, because even if the mobile device is working correctly, it may still not connect from -for some settings on someone else's router, such as protection by MAC addresses or disabling the automatic distribution of IP addresses. In this case, the whole process will be looped on the message 'Receiving IP-address'.
to the content
