 It's easy to connect Android to your computer via Wi-Fi, and there are even several different options on how to do this. Thus, the user can get not only access to files, but also fully remotely control the gadget. Earlier we described how to connect and remotely control a PC via Android to Bluetooth.
How to connect Android to PC via Wi-Fi
For this to be possible, we need to install special applications both on a computer and on a smartphone (or tablet). But there is no problem with that. You can easily find any program you need in GooglePlay.
So let's look at how to connect a gadget with OS Android to a computer over the air. Here, you first need to decide what exactly you want to connect to. The point is that specific applications are used for different tasks. For example, to access your files, you can use an FTP server program that you need to install on your smartphone.
Once launched, the application will assign an IP address to the phone. It will need to be registered in a browser or file explorer on a computer. After that, you will be able to access your smartphone files from your computer.
Here is a list of the most common applications that allow access to Android from a PC via Wi-Fi:
- FTP server.
- AirDroid.
- MyPhoneExplorer.
It is worth noting that the FTP server allows you to work exclusively with files of internal memory and flash drives. If you need access to messages, phonebook and other applications on your phone, then MyPhoneExplorer will help you here.

This is a handy utility that allows full access. In this case, you can freely delete contacts, send messages, and so on.
For this program to work, you need to install it on your smartphone and computer. After launch, select the connection method:
- Wi-Fi.
- Bluetooth.
- USB.
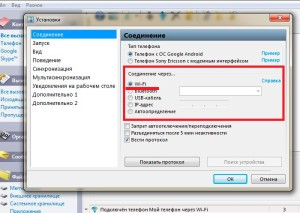
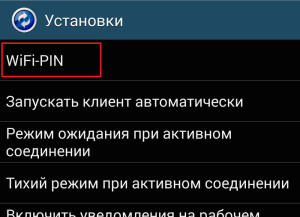
Then the system is synchronized. In the settings of the utility on the phone, you can specify the PIN code that is required for synchronization. To do this, press the 'Settings' button and select 'Wi-Fi-PIN'.
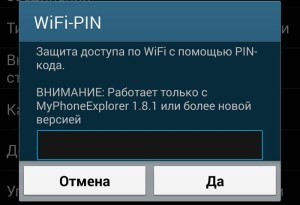
Now all that remains is to enter the specified PIN code and the name of the connected smartphone.
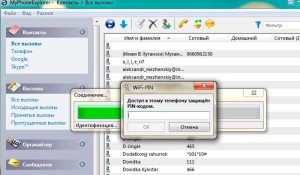
Moreover, the name can be anything you want. It is introduced for convenience, so that you can see in the future what kind of device you are working with.


Now you know how to access your phone Android from your computer using Wi-Fi.
Sometimes it doesn't stop there. To access the Internet on a smartphone, Wi-Fi is most often used. But what if you don't have a wireless router, but your laptop is connected to the Internet via a cable? In this case, you can share Wi-Fi from your laptop.
In this case, all connected devices will have access to the global network. So, let's take a closer look at how to do this.
to the content
Connecting Android to a computer via Wi-Fi: Video
to the content
Sharing Wi-Fi from a laptop
You can distribute the network both from a laptop and from a stationary PC. But, if laptops are almost always equipped with wireless adapters, then with a stationary PC everything is somewhat more complicated. Before proceeding with further steps, make sure that the latter is equipped with a Wi-Fi module.
We have two options for connecting the Internet from a computer to a mobile phone with OS Android via Wi-Fi:
- Use built-in utilities Windows.
- Install a special utility from a third-party developer.
The first option does not require you to search for and install additional programs. It involves setting up a PC using the command line. Basically, you only have to execute two commands. Let's take a closer look at this process.
to the content
Networking through the command line
First, let's start the service we need. It is done like this: press the key combination [Start] + [R]. In the window that appears, write CMD and press [Enter].

Thus, we launched the command line. Now it remains to register two commands:
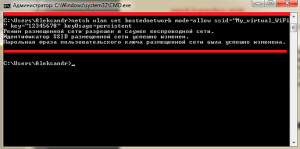
- netshwlansethostednetworkmode = allowssid = “My_virtual_WiFi” key = “12345678” keyUsage = persistent – this command will install the appropriate driver and create a virtual Wi-Fi adapter. In addition, it will create a virtual wireless network. Here SSID is the distribution name, KEY is the password that will be required to connect.
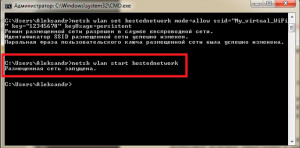
- Now you need to run the created distribution. To do this, write the following command – netshwlanstarthostednetwork.
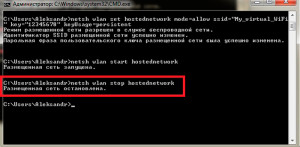
- To stop the distribution from running, register netshwlanstophostednetwork.
So, now you are distributing Wi-Fi, but users still cannot connect to you and do not have Internet access. To fix this, we need to set up sharing. To do this, right-click on the network icon in the system tray. Select 'Network and Sharing Center'.

Go to the 'Change advanced sharing settings' section. Here you need to enable discovery and sharing at all points, as well as disable password protection. We save the settings and return to the control center.


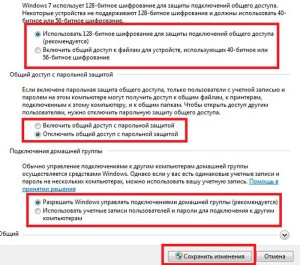
Open the 'Change adapter settings' item.

Here you will see all the available computer connections. Our virtual giveaway will be called 'Wireless 2'. We need to choose the connection through which the computer goes to the Internet. Right click on it and select 'Properties'.

Go to the 'Access' tab. Next, check the box next to 'Allow other users to use this computer's Internet connection'.

Below in the line 'Home network connection' select our virtual network. Click Ok. This completes the setup procedure. Now all connected subscribers will have Internet access.
to the content
Through third party programs
There is another way, how to connect the Internet from a laptop to a mobile phone with OS Android via wireless Wi-Fi. It implies the use of third-party programs such as Virtual Router Plus. This program allows you to distribute the Internet over Wi-Fi.
In this case, the setting is reduced to three points:
- Come up with and enter a name for the network.
- Set a security password.
- Specify an Internet connection that provides Internet access.
As you can see, everything is extremely simple. The first option is better because you don't need to install any utilities. At the same time, the connection works more stable and secure.
The second option is easier to set up and use, but sometimes certain problems and crashes can occur. Which of the options to choose is entirely up to you.
to the content
