 Especially for people with impaired coordination, musculoskeletal system, Android developers have implemented special features in every smartphone based on this operating system.
Your phone has these settings too. I will consider specials. possibilities on the example of a Samsung smartphone.
Go to Settings> Accessibility> Coordination and Interaction Disorders.

Let's look at each option separately.
Universal switch
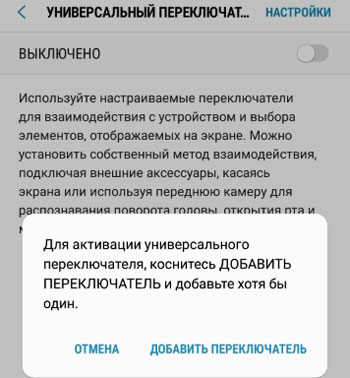
Set up universal switches to interact with your phone and select items on the screen. You can set your own interaction method by connecting external accessories, touching the screen, or using the front camera to recognize head rotation, mouth opening and eye blinking.
to the content
Add switch
How do I add a switch? Move the slider to the On position. – it will prompt you to add one switch. Click on the button:
Next, we configure 3 options:

- Choose a place in the phone that will open
- Connect an optional accessory to the phone and press any of its buttons to recognize (optional).
- Camera. Set up your phone camera to detect movements of your head, eyes, or lips. The following movements are available: turn your head to the left, turn your head to the right, raise your head, lower your head, blink, open your mouth.
As a result, the camera will react to your every action or movement, and the smartphone will perform some function: change the volume, go to the menu, launch a specific application, turn off, back, open notifications and other functions and parameters that you specify. The choice is huge. Even a person who is paralyzed and bedridden (in a wheelchair) will be able to control his phone, call and even write messages.
to the content
Settings
To customize the universal switch for a specific person, select “Settings” in the upper right corner of the switch menu.

A list of all active switches is available in the settings (you can delete unnecessary ones).
Search settings:
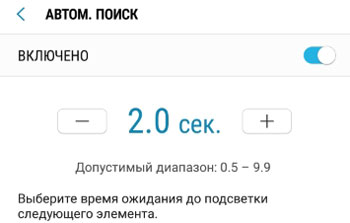
- Automatic search. Set the waiting time between different gestures / movements. The default is 2 seconds.
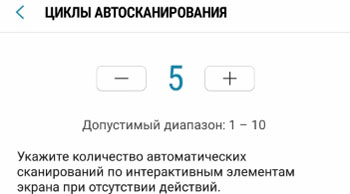
- Auto scan cycles. How many times will the screen be scanned automatically when there is no action on your part. The default is 5 times.
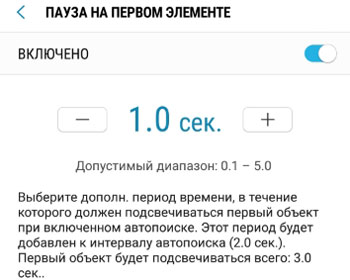
- Pause on the first item. How long will the selected item be highlighted on the screen before moving to the next item (default 1 second). The pause time is added to the auto search time. Those. in my case it is 3 seconds (2 + 1).
- Scanning method – line or point. If you chose “point”:
- Point scan speed (default 10). Select the speed at which the line moves when scanning the screen vertically and horizontally.

- Point scan speed (default 10). Select the speed at which the line moves when scanning the screen vertically and horizontally.
- Scan direction: top-down or bottom-up. Those. in which direction the front camera will scan your movement. If the person is recumbent, then it is better to choose “bottom up” – this will increase the speed and accuracy of response.
Additional settings:
- Auto-pressing. adjust the idle time before the favorite on the screen is automatically selected. This is usually 1 second.

- Auto-touch to the keyboard. Do not display a menu of additional actions when touching the keyboard while scanning lines or dots. Read about this menu later in the article.
- Duration of pressing. Those. how long does it take to press the screen for this press to be recognized as a touch and selection of a certain element (usual tap on the screen, as everyone does). This time should be less than the auto-touch time so that everything is not selected. Set for 0.5 seconds.

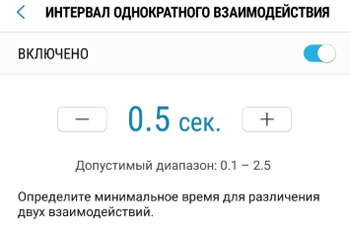
- Single interaction interval. Choose a minimum amount of time for the phone to distinguish between two different interactions / touches. This is usually 0.5 seconds.
Feedback settings:
- Cursor color. Choose your favorite color. Red, orange, yellow, gray, blue, green and yellow are available.
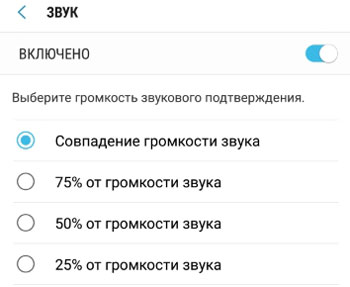
- Sound. Select the volume of the confirmation sound. Those. how loudly the phone will repeat after you or voice your actions.
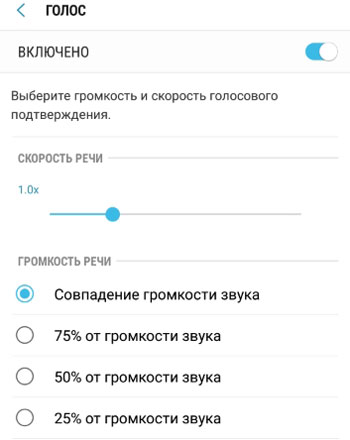
- Vote. Select the speed and volume of the voice confirmation.
Manage menu options. This is where you select menu items to display in the Universal Switch – more on that later in the article. the following menu options are available: actions, settings, main screen, buttons and keys, edit text, context menu (menu location on the first line, depending on activity).
to the content
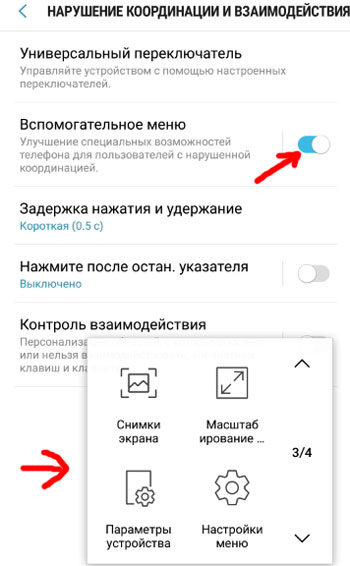
Secondary menu
Improves the accessibility of your phone for people with impaired coordination. When the option is activated, an additional button appears on the side of the screen that opens the most popular menu items.
to the content
Settings
The following settings are available for the sub menu:
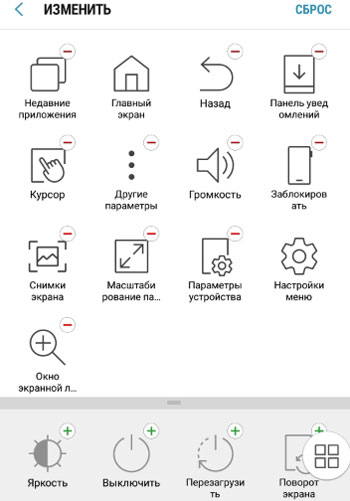
- Change the order of menu icons, add / remove items.
- Extended menu. Displays context menu options for selected applications in the sub menu.

- Touchpad size: small, medium or large.
- Cursor size: medium or large.
- Cursor speed: slow, normal and high.
- Zoom window – adjust the desired window scale.

- Magnifier size: small, medium, large. do not choose a large size, it only gets in the way of the screen.
to the content
Delay pressing and holding
The default is 0.5 second delay. Those. this is the time it takes for the phone to understand that your tap on the screen = selection of the desired item (i.e., this is not an accidental touch). In simple terms, this is the time of the usual tap (pressing) on the screen, on which we open something in the phone.
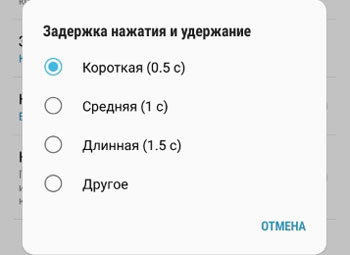
If a person has disorders of the musculoskeletal system, it is better to set more time: 1-3 seconds.
to the content
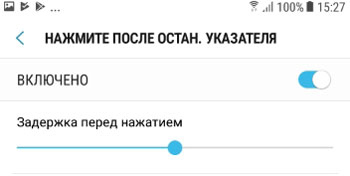
Click after the pointer stops
Set the delay before clicking on an item on the screen. For example, I set it to 1 second. This means that after stopping the pointer (cursor) on the selected element (application icon), 1 second must pass before clicking.
to the content
Interaction control
Those. personalization of areas of the screen with which you can or cannot interact, buttons on the phone case and keyboard.
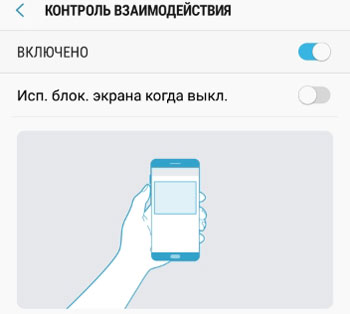
With Interaction Control, you can block touch responses in certain parts of the screen. This is a very useful thing if a person does not completely control his movements of arms, legs or parts of the face (if he controls them). Some paralyzed people use the tip of their nose or tongue to tap the screen.
When this option is enabled, auto-rotate screen will be disabled. All calls, some app notifications and touch input for the notification bar will be blocked.
To enable / disable Interaction Control, press and hold the Home and Volume Down buttons at the same time.
Additionally, here you can activate the option “Use screen lock when off”. Those. the phone turns off, the screen is locked. better not enable this setting.
Let's summarize. We have analyzed all the possibilities offered by smartphone manufacturers for people with impaired coordination and work of the musculoskeletal system, paralyzed. Remember that a diagnosis is not a sentence. You can still actively communicate on the Internet, write messages, work with applications – all this by interacting with the smart camera on your phone.