 Mail.Ru is one of the most popular mail services on the Internet. With the advent of smartphones, it became possible to use mail directly on the phone. However, on the same Android, setting up access to the box has some peculiarities. In this article, we will take a closer look at how Mail.Ru mail is configured to Android.
How to set up Mail.Ru mail on Android
First you need to find the 'Mail' utility, which is preinstalled on Android by default. Enter it, go to the 'E-mail' item and click the 'Menu' icon and then 'Settings'. In the upper left corner there will be an 'Add Account' button. After that, the 'E-mail supports most popular services' window will appear. There will be two lines to fill in. The first line is 'Name'. It must be entered completely by the type [email protected] and the password for the mailbox.
The next window will ask you to select the type of account. There will be 3 options: POP3, IMAP, Exchange.

For the best smoothness and speed of work, it is better to choose the second option. Consider the case where POP3 was chosen.

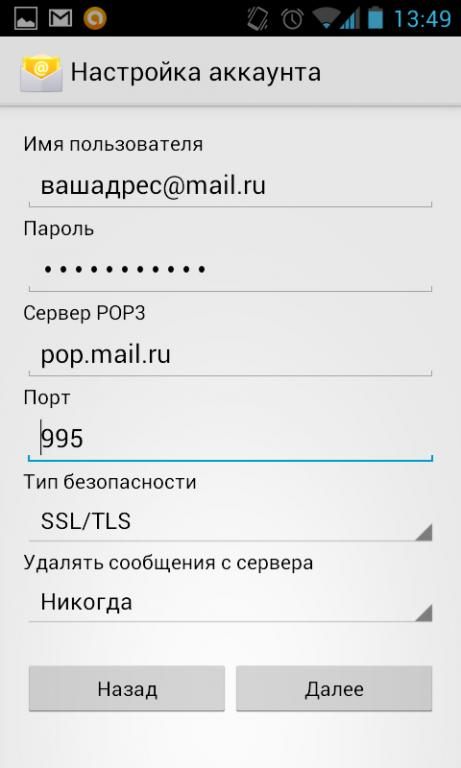
Another window will appear here, where you will need to fill in the 'POP3 Server' fields. Here you need to enter pop.mail.ru. Next, 'Port' – enter 995, 'Security type' – SSL / TLS, and in the last column, 'Delete messages from the server', select 'Never'.
Configuring IMAP is similar. Only in the 'Port' column you need to enter 993, 'IMAP Server' – respectively imap.mail.ru, 'Security type' is the same as in POP3. We leave the rest unchanged.

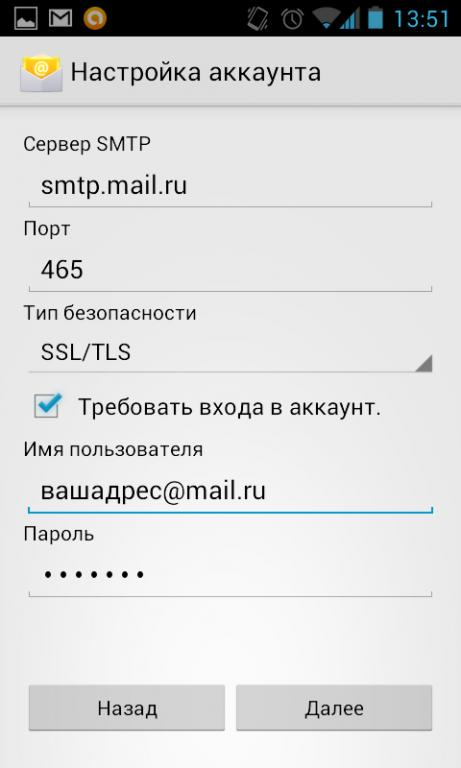
After installing the protocol, the last window will appear, where you need to fill in the 'SMTP Server' item, you need to enter smtp.mail.ru, the 'Security type' – SSL / TLS, and there should already be a check mark in the 'Require account login' item. Everything else is already filled in.
After that, all that remains is to press the 'Next' button and enjoy all the advantages of the e-mail box. Here it was described in detail how to set up Mail.Ru mail on your device. If it becomes necessary to add another account, you will have to do all of the above, just change the data in the 'Password' and 'Username' columns.
to the content
Setting up Mail.Ru mail on Android: Video
to the content
Possible problems when setting up a mail service
The system Android is not perfect. Sometimes a network error occurs while working with mail on Android. In such a situation, the first thing to do is to check that all the data has been entered correctly. Next, see if the Internet is gone. If everything is fine, you need to restart the device and try to enter everything again. In most cases, after such manipulations, everything starts working normally.
to the content
Mail client for the Android system: Video
to the content
Mail agent for using the Mail.Ru service
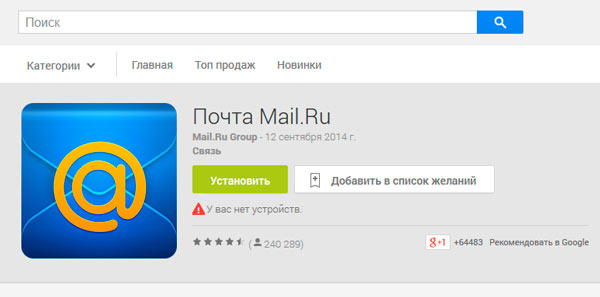
There is an official mail agent for Android from Mail.Ru. You can download it on Google Play using the link. The client is configured according to the algorithm described above. The application is smooth and stable. In addition, there are many alternative clients. They can be both paid and free, and differ in functionality. Which one to choose depends solely on personal preference.
Thus, we saw that installing the Mail.Ru service is not difficult at all, and instead of the standard client, you can use alternative ones.

