BlueStacks HD App Player allows you to run apps Android on OS Windows. By installing the application, the user receives a fully functional shell under Android on the PC, into which he can download programs and games directly from Google Play. The emulator allows you to run applications Android in windowed or full screen mode, and its interface is surprising in its simplicity. However, sometimes there are questions about how to start BlueStacks. Let's try to figure it out.

Application features
Suffice it to say that it is the only emulator supported by investments Intel, Samsung, Qualcomm and AMD. The use of the multilayer cake technology has made it possible to create a product that still cannot be surpassed by newer ambitious analogues. Today, the third generation of the emulator is at the top of the ratings among similar applications. And all thanks to the following features:
- Multitasking.
- High speed of work.
- Auto update.
- Synchronizing and launching applications without connecting Android.
- Support for Android Debug Bridge.
- Ability to play 3D games.
- Access to AMD AppZone, Google Play and Amazon App Store,
- Access to virtual SD cards and root.
- Russian language interface.
And that's not all.
to the content
Launching the emulator after installation
Before running BlueStacks on Windows 7 or another version of the operating system, the program must be downloaded to your computer. The latest version can be found on the official website of the developer. It is easy to find even an offline installer on the Internet if the Internet connection does not allow. The procedure is no different from installing regular programs.
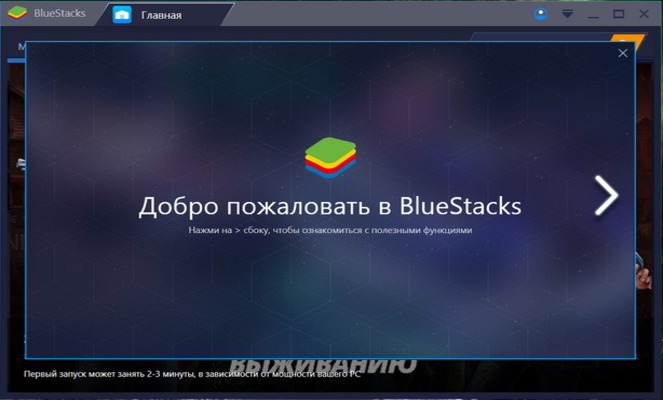
First, the user will be prompted to initialize and configure the embedded OS Android.
to the content
Registration in BlueStacks
To sign up for BlueStacks 2, you need a Google account – to install apps from Google Play. If not, you will have to create it. The procedure is very simple.
to the content
One-time setup
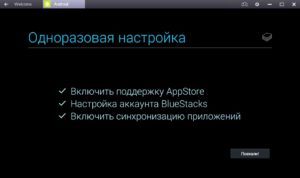
To start using the emulator right away, you can make a brief setup, which is called one-time. It only takes a few easy steps to activate BlueStacks:
- Upon opening, the program will ask you to enter the initial settings.
 You can connect data backup and Google Play newsletter.
 - Next, authorization will be requested through your Google account

- Synchronization takes place after login.

If you look at the list of accounts, you can see Google and BlueStacks, which will differ only in icons.
to the content
Running applications on the emulator
To install applications from stores or the BlueStacks server, the standard search for Android is used. If the user does not find anything suitable, you can use the APK installation file of the application distributed over the Internet.
After installation, the application can be launched from the main page by double clicking on the icon. Programs downloaded from Google Play can be opened directly from the emulator by clicking on the 'Open' icon. In other words, you can launch the game in BlueStacks in the way that users are familiar with Android. Once launched, an application from the All Applications tab will be available on the Recently Opened page.
to the content
How to Hack BlueStacks
Very often, users are faced with paid applications or built-in purchases, and the abundance of advertising causes fair indignation. The emulator has a premium version that handles these problems easily, but it is paid. It is in such cases that it is required, so to speak, to grunt BlueStacks.
An ordinary user cannot do this or is very problematic. Usually they use the jailbroken version, which has the necessary premium features. If you google it well, you can surely find a dozen decently working and affordable versions of the modified utility.
to the content
Problems launching BlueStacks
The emulator is very stable. Of course, subject to all system requirements for installation, and so on. Difficulties with starting the program may arise for the following reasons:
- Incorrect installation.
- Mismatch of computer settings / operating system version.
- Viruses (and antiviruses).
- System crashes and poor internet connection.
When you can't open BlueStacks, in principle, the list of possible problems is not much different from situations when any other program on Windows does not work. At the same time, the user's work algorithm for identifying and correcting deficiencies is also not specific. There is nothing new and complicated.
to the content
Pros and cons of BlueStacks
The emulator supports the vast majority of applications for Android, and it is free, these are the main advantages of the program. According to various estimates, up to 96% of applications and almost 90% of the newest games, including 3D, work without problems with it. All other advantages of BlueStacks lie in the capabilities of the application, which we wrote about above, as well as in their successful implementation.
A large selection of pre-installed programs and a beautiful (and most importantly, intuitive) multilingual interface increase the attractiveness of the emulator for users. Setting up the shell fully reproduces the functions Android, and having your own streaming service significantly expands the possibilities.
However, users also identified a number of shortcomings:
- Big gluttony in terms of RAM consumption.
- Complicated removal process.
- There may be 'conflicts' with other software and, as a result, bugs, errors and freezes.
In BlueStacks 3, these disadvantages became less noticeable, but still, they did not completely disappear.
to the content
